The ReplayerStudio User Manual
for ReplayerStudio version 2.0


Copyright © 2007 by Eric Freeman and ReplayerStudio.com
This manual was last updated on May 27, 2007
If you opened this manual from within the ReplayerStudio program, you may find a more recent version at:
replayerstudio.com/ReplayerStudio_2.0_User_Manual.htm
(Simply compare the date above to that of the online manual
to see if you have the most recent version.)
General Notes
As you begin using ReplayerStudio, please note that the program has been designed to be as user-friendly as possible. All of the mouse buttons are large and clearly labeled to help you figure out what they do and how they work. However, for more thorough instructions, try placing your mouse over a button or control. Doing this will usually reveal mouse-over pop-up messages that provide you with a more complete description of what the control does, and how it works. We hope that these pop-up messages will help minimize the learning curve for everybody! (Note: when you no longer need these pop-up messages, you can disable them from within the Tools / Options menu. Click here for more info.)
In addition, one basic definition that will be used throughout this manual: When we use the term “clip” (as in “view clip”), we are referring to either a video or audio file. This “clip” could be either a very short video file, or a very long one (over an hour, for example).
Throughout this manual we will often refer to ReplayerStudio as simply “RPS.”
Using ReplayerStudio—Basic to Advanced
This user manual is organized into eight main sections, which are summarized below. We have designed this manual to provide you with a logical progression for learning to use RPS’s many features, from basic to advanced.
While you are always free to use this manual as a reference guide, we recommend reading through the first six sections, in sequence (Sections I through VI). Doing this will help you learn RPS’s many features as fast as possible.
Section VII covers an advanced feature that you might want to come back to after you have become fairly familiar with RPS’s bookmarking and cataloging features. The last section, Section VIII, contains various additional notes, details, and tips on how to use ReplayerStudio most efficiently.
I. Basic Operation
The very basics, plus a few notes to keep in mind.
II. Using the Player Controls
This section shows you how to get the most out of RPS’s powerful video playback features, including:
III: Using the Window Controls
Learn how to control the size and appearance of the Video Playback Window.
IV: Using the Loop Controls
Say you have some special scenes in a long video that you want to watch over and over again. ReplayerStudio gives you the ability to define playback loops from within large video clips.
V: Adios Mr. Mouse! Learning to Use the Keyboard Controls
Once you’ve learned the basic operation of the Player, Window, and Loop controls, you can now learn to command these features from your keyboard—the ultimate goal for becoming a savvy RPS user!
· Complete List of Keyboard Controls
VI: Using the Bookmarking & Cataloging Features
This section explains how you can save video loops for future viewing and analysis. These saved video loops, or bookmarks, can then be named, rated, and even annotated within a special file called a video catalog.
VII: Exporting Video Catalog Files to Word Processor and Spreadsheet Applications
This feature is for advanced use only! Read this section only if you want to customize your video catalog files using your own colors, formats, fonts, templates, etc. and then playback your bookmarks from within these custom catalog files.
VIII: Other Important Notes
This section covers some other important features—and also provides some useful tips—to help you better understand what ReplayerStudio can do.
o Setting the Default Video Clip Directory
o Playing Other Files in a Designated Directory at the press of a button
o Setting the Default Video Catalog Directory
o Tired of seeing the Pop-Up Hints? Turn them off!
o Restoring the Original Keyboard and Window Settings
o Setting the Bookmark Play Click Behavior
o Importing Multiple Video Clips into a Single Video Catalog
o Fixing Lost or “Broken” Bookmarks with a Video Catalog
· Getting the Most Out of ReplayerStudio
o Learning to Use the Keyboard as Much as Possible
§ Within the Video PlaybackWindow
§ Within the Video Cataloging Window
§ Keystrokes Work in almost All Windows
§ An Efficient Workflow Example
§ Maximizing Your Display Areas
§ Extra Feature – Jumping to start and end of loops and bookmarks
o Other Tricks Using ReplayerStudio
§ Using ReplayerStudio to Make a Mock-Up of Your Final Video Project
§ Manually Editing Your Video Catalog Files
§ Turning Your Video Catalog File into an EDL and a Batch Capture File for Video Editing
IX: Version 1.5 Enhancements
X: The BeatCounter©
Most useful applications for the BeatCounter©
Quick Start Guide for the BeatCounter
How RPS stores BeatCounter marker information.
Jumping around from beat to beat or measure to measure
Section I. Basic Operation
- Press the
 button (appears
as
button (appears
as  in Beginner
Mode – see #6 below) (or press ‘c’ on your keyboard) to
open and play a media clip (normally a video clip, but you can open and
play audio clips as well).
in Beginner
Mode – see #6 below) (or press ‘c’ on your keyboard) to
open and play a media clip (normally a video clip, but you can open and
play audio clips as well).
- Use the Basic Play Controls to
 ,
,  ,
,
 , and
, and  (to
mute and un-mute) a video clip.
(to
mute and un-mute) a video clip.
- Use the
 and
and  buttons
to play the next and previous video files, respectively, that are in
the same directory as the video file currently playing.
buttons
to play the next and previous video files, respectively, that are in
the same directory as the video file currently playing.
- If you like, you can change the default video directory
from within the “Tools / Options” window. Then, when
you open a video file by pressing , ReplayerStudio
will automatically look in the folder you have designated. For more
details, click here.
- Exiting ReplayerStudio is as easy as can be. Press
 in the main
window (we call this the “Video Playback Window”), or, simply press the ‘z’
key on your keyboard at any time (from almost any window).
in the main
window (we call this the “Video Playback Window”), or, simply press the ‘z’
key on your keyboard at any time (from almost any window).
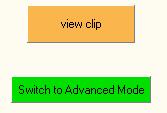
- ReplayerStudio will start up the first time in Beginner
Mode. This mode contains most of the features of ReplayerStudio but
without showing the keystroke equivalents. The window will generally look
much simpler, and we recommend starting off in this mode until you
familiarize yourself with all of the controls. To switch to the regular (Advanced)
mode, press
 . To switch
back at any time, press
. To switch
back at any time, press  . Please keep
in mind that all of the screenshots shown in this user manual are as they
appear in Advanced Mode. However, all of the buttons will appear
almost the same (usually with just the keyboard equivalent hidden.)
. Please keep
in mind that all of the screenshots shown in this user manual are as they
appear in Advanced Mode. However, all of the buttons will appear
almost the same (usually with just the keyboard equivalent hidden.)
A few general notes to keep in mind:
- We recommend that you don't use the slider bar very much, unless you are just randomly browsing around for scenes (or dance moves)—instead, use the Player Controls. With the Player Controls, you will find that you have much faster and more precise control over the position of video playback.
![]()
- We also recommend that you don't use the stop icon.
 (The solid black
square.) If you stop your clip while it is playing, you will lose your
place and will have to go back and find the position you were viewing. In
fact, there is no need to use any of the three icons shown below.
Instead, use the pause and play buttons in the “Basic Play
Controls” panel. On second thought, don’t even bother with that, either!
Just try your space bar; it will pause and re-start the video
action, and you’ll never lose your place!
(The solid black
square.) If you stop your clip while it is playing, you will lose your
place and will have to go back and find the position you were viewing. In
fact, there is no need to use any of the three icons shown below.
Instead, use the pause and play buttons in the “Basic Play
Controls” panel. On second thought, don’t even bother with that, either!
Just try your space bar; it will pause and re-start the video
action, and you’ll never lose your place!
![]()
- The time code is in the format "hh:mm:ss:ff" (hours : minutes : seconds : frames).
- Double clicking in the precise time code box allows you to directly enter time code to jump to:
![]() to
to ![]()
- If you find the precise time code display distracting, simply press the checkbox just to the right, and it will go away.
- In the lower right hand side of the video display there
are two “time codes” separated by a “/”
 The
first time code indicates your current position within the clip (like the
precise time code in yellow, but without the frame information), and the
second time code represents the total time of the video clip you are
viewing.
The
first time code indicates your current position within the clip (like the
precise time code in yellow, but without the frame information), and the
second time code represents the total time of the video clip you are
viewing.
Section II. Using the Player Controls
Although ReplayerStudio is packed with features, the Player Controls are really the core of the program. These great playback features were the original motivation for creating ReplayerStudio. If you take the time to really learn these controls (and all their associated keystrokes), you’ll drastically improve the speed, efficiency, and enjoyment of watching video. In fact, you’ll, eventually wonder how you ever watched video without ReplayerStudio!
To begin, it might be a good idea to see the ReplayerStudio Product Tour for some good, basic information about these player controls:
www.ReplayerStudio.com/product_tour_playback.htm
Basic Play Controls
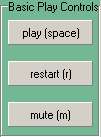
As described previously, the spacebar on your keyboard plays
and pauses the video playback. (The button, ![]() , is just really there
to show you how everything works – it is not really meant to be used.)
, is just really there
to show you how everything works – it is not really meant to be used.)
The ![]() button does what is
says—it restarts your video clip from the beginning. You can also simply hit
the ‘r’ key. This is a good keystroke to remember.
button does what is
says—it restarts your video clip from the beginning. You can also simply hit
the ‘r’ key. This is a good keystroke to remember.
The ![]() button stops the audio
from playing. You can also simply hit the ‘m’ key.
button stops the audio
from playing. You can also simply hit the ‘m’ key.
Advanced Player Controls
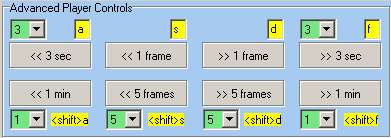
These are the first features that make ReplayerStudio unique from other video players. These controls allow you to move through a video file quickly, and however you want to. After mastering these controls, you will find that you rarely will need to (or want to!) use the slider bar.
![]() will jump the video
position ahead exactly three seconds.
will jump the video
position ahead exactly three seconds.
![]() will jump the video
position back exactly three seconds. This simple button makes video analysis
so much easier! By pressing this button once or twice, for example, you can
instantly return to the beginning of a dance move you are studying!
will jump the video
position back exactly three seconds. This simple button makes video analysis
so much easier! By pressing this button once or twice, for example, you can
instantly return to the beginning of a dance move you are studying!
For observing a short clip or piece of action, jumping back
three seconds ( ) may be ideal.
However, for a longer video sequence, or for a more complicated dance move, you
may want to jump back more than three seconds. Conversely, when viewing a very
short video sequence (or a quick dance move), three seconds may be too much.
Of course, you can simply hit the jump back button more than once, but if you
normally go back more time (or less time), you may want to adjust this value.
With ReplayerStudio, doing this is very easy – simply click on the green pull
down menu next to the mouse button, and you can select from many values:
) may be ideal.
However, for a longer video sequence, or for a more complicated dance move, you
may want to jump back more than three seconds. Conversely, when viewing a very
short video sequence (or a quick dance move), three seconds may be too much.
Of course, you can simply hit the jump back button more than once, but if you
normally go back more time (or less time), you may want to adjust this value.
With ReplayerStudio, doing this is very easy – simply click on the green pull
down menu next to the mouse button, and you can select from many values: ![]() .
.
Current choices are: 1, 2, 3, 4, 5, 6, 7, 10, and even 20
seconds. Once you have selected your new value, the label of the button itself
will update to indicate the new chosen value ( .) Furthermore, all of
your settings will be saved to your configuration
file, so that the next time you start up ReplayerStudio, the program will
open with these settings.
.) Furthermore, all of
your settings will be saved to your configuration
file, so that the next time you start up ReplayerStudio, the program will
open with these settings.
You can also adjust the number of frames and even minutes to jump forward and back. Using the pull-down menus directly adjacent to their respective mouse buttons, simply select the values that best fit your needs.
If a desired value doesn’t appear, please email us; we will do our best to incorporate your desired value into the next release of RPS.
Changing Keyboard Equivalents
RPS’s default Player Control keystroke settings have been
specially chosen for the traditional typing position (four fingers of left hand
over keys ![]() ; four fingers of right
hand over
; four fingers of right
hand over ![]() ). If you place the
fingers of your left hand over the keyboard like this (touching
). If you place the
fingers of your left hand over the keyboard like this (touching ![]() ),
you should be able to operate all the keystroke controls without ever lifting
your hand from the keyboard. Furthermore, unlike typing, you won’t even need
to move your fingers to another key.
),
you should be able to operate all the keystroke controls without ever lifting
your hand from the keyboard. Furthermore, unlike typing, you won’t even need
to move your fingers to another key.
However, RPS’s keystroke settings can be changed. Say, for
example, that you are right-handed and prefer to use your right hand to operate
the Player Controls. No problem! Just place your mouse cursor into the yellow
boxes, ![]() , then change them to
the keys you want to use. To maintain consistency with the typing position of
your right hand, you’ll want to re-set these strokes to
, then change them to
the keys you want to use. To maintain consistency with the typing position of
your right hand, you’ll want to re-set these strokes to ![]() .
However, you are free to choose any set of keys you want.
.
However, you are free to choose any set of keys you want.
Warning: You should not assign one keystroke to more than one button, or the application could become unstable. However, this rule is only loosely enforced from within ReplayerStudio. As such, it is important that, after reassigning any keystroke value(s), you check to make sure that the keystrokes you chose haven’t already been assigned to another command. For example, if you change the Player Control keystroke values from “A-S-F-D” to “J-K-L-;” you must then also change the keystrokes assigned to the Speed Controls, which are, by default, set to “J-K-L”.
For a more complete explanation of changing keyboard equivalents, click here.
Speed Controls
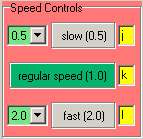
Playing back your video at different speeds can be very useful. Slow motion is useful for analyzing a video clip (such as a complex dance move) more carefully. Fast motion is useful if you are looking for a certain scene or dance move in a long clip and need to quickly scan the whole clip.
You can set the speed in the drop-down boxes next to the buttons:
![]()
![]()
1.0—regular speed.
0.1—one-tenth (10% of) normal speed.
0.9—90% of normal speed.
2.0—twice as fast as regular speed.
and so on …
Section III. Using the Window Controls
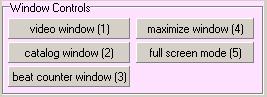
Video Window (“1” key)
The “1” key (![]() ) brings the
Main Video Window to the front so you can see it. Actually, if you press this
button, it won’t do anything, as this window is already the one you are viewing
in front. However, it’s very useful to remember that the “1” key from another
window (from the Cataloging window for example), will bring back the main video
window to the front.
) brings the
Main Video Window to the front so you can see it. Actually, if you press this
button, it won’t do anything, as this window is already the one you are viewing
in front. However, it’s very useful to remember that the “1” key from another
window (from the Cataloging window for example), will bring back the main video
window to the front.
Catalog Window (“2” key)
The “2” key (![]() ) brings the
Cataloging Window to the front so you can see it. This key only works when you
have a video catalog file open.
) brings the
Cataloging Window to the front so you can see it. This key only works when you
have a video catalog file open.
BeatCounter Window (“3” key)
The “3” key (![]() ) brings the
BeatCounter Window to the front so you can see it.
) brings the
BeatCounter Window to the front so you can see it.
Maximize Window (“4” key)
To maximize the Video Playback Window, press the ![]() , or the “4”
key. Doing this will not change the visibility of the player controls (if they
were visible before maximizing, they will be visible after maximizing). To
return to the previous window size, simply press the same mouse button (which
now will appear as
, or the “4”
key. Doing this will not change the visibility of the player controls (if they
were visible before maximizing, they will be visible after maximizing). To
return to the previous window size, simply press the same mouse button (which
now will appear as ![]() ), or press the “4”
key again.
), or press the “4”
key again.
Full Screen Mode ( “5” key)
Full Screen Mode allows you to watch video with
nothing else in the way—your video will fill the entire screen. To play video
in Full Screen Mode, press the ![]() button, or the “5”
key. All player control panels will be hidden. To get out of this mode, press
either “5”to return to the window size you were using previously, or the
“4” key to switch to the Maximize Window Mode. Both of these actions
will restore the player control panels.
button, or the “5”
key. All player control panels will be hidden. To get out of this mode, press
either “5”to return to the window size you were using previously, or the
“4” key to switch to the Maximize Window Mode. Both of these actions
will restore the player control panels.
Please Note: To get out of Full Screen Mode, you must remember to press either “4” or “5” to get out of Full Screen Mode. (Do not press the <Esc> key to get out of Full Screen Mode, as doing so will cause the keystrokes to work improperly. If you hit <Esc> by accident, simply go back into Full Screen Mode, and then press “5” to properly get out).
Another Note: When in Full Screen Mode, you can always view the slider bar by moving your mouse a little bit. The slider bar will appear long enough to use it to change your video position.
One of the great features of ReplayerStudio is the ability to use keystrokes from any window, and in any mode. As such, all of your keystroke commands will still work, even when in Full Screen Mode (of course, since no mouse buttons are visible, you will have to rely on the keyboard, and, hence, on your memory). So, while in Full Screen Mode, you can do everything you can when in other video playback modes, including pause and resume video playback, jump around the timeline, define loops, and add bookmarks. In addition, the play ‘previous’, ‘current’, and ‘next’ bookmark functions will work.
Suggestion: When giving a video presentation, or if you just want to sit back and watch your video project mock-up, try pressing “Play All Bookmarks,” and then press “5” to watch the video in Full Screen Mode. (All of the bookmark playback features are explained in the Video Cataloging section (click here) below.)
Shrink Video (<F5>) and Enlarge Video (<F6>)
The <F5> and <F6> keys, incrementally shrink and enlarge the Main Video Window, respectively (of course, you can also re-size the Main Video Window with your mouse; just left-click on any corner of the window and then drag to re-size).
Section IV. Using the Loop Controls
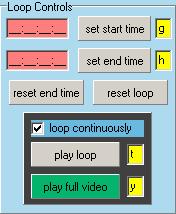
RPS’s Loop Controls are very useful if you want to play a small section(s) of a long video clip over and over again. In fact, this is one of RPS’s most useful and unique features! Here’s how it works:
Defining a Loop
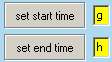
Notice the special “time code” boxes in the Loop Control Panel:

The upper box denotes the start time of a loop, while the lower box denotes the end time.
To
define a playback loop, simply play a video clip, then press ![]() when
you get to the beginning of the scene you want to define as a loop. Note how ReplayerStudio
inserts the time code of the video at the point that you pressed the button
into the upper time code box. ReplayerStudio uses the time code that is shown
in the lower right-hand corner of the video display area itself. (Click here for more explanation about time codes.)
when
you get to the beginning of the scene you want to define as a loop. Note how ReplayerStudio
inserts the time code of the video at the point that you pressed the button
into the upper time code box. ReplayerStudio uses the time code that is shown
in the lower right-hand corner of the video display area itself. (Click here for more explanation about time codes.)
Please Note: You can define loops either while the video is playing, or while it is paused.
After
you’ve set your start time, allow the clip to continue (or resume) playing.
When you come to the end of the scene you want to define, press ![]() . RPS
will then insert the time code of the video at the point that you pressed the
button into the lower time code box.
. RPS
will then insert the time code of the video at the point that you pressed the
button into the lower time code box.
Please Note: Defining an end time is optional—you can define a loop with only a start time (the default end time would then be the end of your video clip).
Aside from using the ‘set start time’ and ‘set end time’ buttons, there are two other ways to define a loop in RPS:
- Use the ‘g’ and ‘h’ keystrokes. This does the same thing as pressing the corresponding buttons with your mouse. The benefit of using the keyboard, of course, is that it is faster. Also, you can watch your video without ever taking your eyes off the action!
- Place your mouse into the time code boxes, and then manually type in the time code(s) of the scene you want to define as a loop:
Manual entry is especially useful when you need to adjust the start and/or end times by just a few seconds. This might happen, for example, if you realize after setting your start time that you set it just a bit too early (or too late). Without bothering to adjust the video playback position, you can easily adjust the start time by a few seconds simply by manually changing it within the time code boxes.
Please note that manually entering time codes only works when in “Advanced Mode”. From “Beginner Mode” you cannot manually modify the time code boxes. To activate “Advanced Mode”, simply press it’s button:
Play Loop Mode
Once you have a loop defined, simply press ![]() (or
press the ‘t’ key), and RPS will play only the loop that you
defined. You will now be in Play Loop Mode, which means that all your video
playback controls will apply only to the loop you have defined.
(or
press the ‘t’ key), and RPS will play only the loop that you
defined. You will now be in Play Loop Mode, which means that all your video
playback controls will apply only to the loop you have defined.
Please Note: By default, your loop will play only once. Upon coming to the end of the loop, ReplayerStudio will pause video playback and wait for further command. To restart the loop again, you have three choices:
- Press the ‘play loop’ button (or the ‘t’ key) either during or at the end of the loop—doing this will immediately start the loop over again.
- Press
 (or the ‘r’
key) either during or at the end of the loop—doing this will immediately
start the loop over again.
(or the ‘r’
key) either during or at the end of the loop—doing this will immediately
start the loop over again. - After the loop has reached the end, hit the ‘play’ button (‘spacebar’) to re-start.
If you prefer to have the loop re-start automatically when
it reaches the end (and, thus, replay continuously), select the ![]() checkbox.
This feature can be useful, for example, when you and your partner are
practicing a dance move over and over again and want to try the move as the
video is playing. If you can dance within view of your computer screen, then
you can set RPS to this mode (you can even playback the move in slow motion, as
well!).
checkbox.
This feature can be useful, for example, when you and your partner are
practicing a dance move over and over again and want to try the move as the
video is playing. If you can dance within view of your computer screen, then
you can set RPS to this mode (you can even playback the move in slow motion, as
well!).
Play Full Video Mode
Of course, just because you defined a loop doesn’t mean you
are stuck watching just that loop. Simply press ![]() (or press
the ‘y’ key) and the video will continue past the end time that
you defined (if you defined an end time). In “play full video” mode,
you will also be able to set the video playback point to before the start time
of your loop. Thus, when you are watching video in “play full video”
mode, ReplayerStudio will play your entire clip, even if you have a loop
defined.
(or press
the ‘y’ key) and the video will continue past the end time that
you defined (if you defined an end time). In “play full video” mode,
you will also be able to set the video playback point to before the start time
of your loop. Thus, when you are watching video in “play full video”
mode, ReplayerStudio will play your entire clip, even if you have a loop
defined.
Please Note: A green highlight denotes
which mode you are currently in:  or
or  .
.
Re-Defining a Loop
You can re-define a loop any time you like by pressing the ‘set
start time’ and/or ‘set end time’ buttons (or the ‘g’
and ‘h’ keys, respectively). Doing this will over-write your
previous start and end times. Of course, you can also manually enter new start
and end times into the time code boxes in the Loop Controls Panel. Or, you can
press ![]() to completely erase
the start and end times you defined.
to completely erase
the start and end times you defined.
Saving a Loop
ReplayerStudio also allows you to save a loop so that you can view it at a later time. To do this, you’ll need to “bookmark” your loop. (See the Creating Bookmarks section below.)
Section V. Adios, Mr. Mouse! Learning to Use the Keyboard Controls
One of the great features of ReplayerStudio is that you can control almost all aspects of video playback from the keyboard. While using the keyboard to control ReplayerStudio’s many playback features will take some time to learn and get comfortable with, you will find this to be so much faster and efficient than using your mouse.
These playback functions,  , are the core of RPS.
As such, once you’ve “mastered” the use of the <spacebar>
, are the core of RPS.
As such, once you’ve “mastered” the use of the <spacebar> ![]() , we recommend
memorizing these keystrokes first.
, we recommend
memorizing these keystrokes first.
The keyboard equivalents to the top row of these mouse
button controls are simply ![]() . For the bottom row,
use these same keys, but hold down the <Shift> key, as
well. These keys are all shown in the yellow boxes just above or below the
mouse buttons themselves.
. For the bottom row,
use these same keys, but hold down the <Shift> key, as
well. These keys are all shown in the yellow boxes just above or below the
mouse buttons themselves.
Mouse or Keyboard? Choose Your Weapon!
ReplayerStudio was designed for everybody, from those who use the mouse for everything to those who use only the keyboard (and everyone in between). However, for the most efficient operation, we recommend that mouse users at least experiment with some of RPS’s keystroke capabilities.
If you’re a die-hard mouse user, you may want to begin your “experimentation” by pressing the button in the User Controls Panel a few times. This button is located in the upper right corner of the Video Playback Window. Notice how pressing this button changes which controls are displayed at the bottom of this window. There are five possible settings, and each is shown below:

![]()
![]()
![]()
![]()
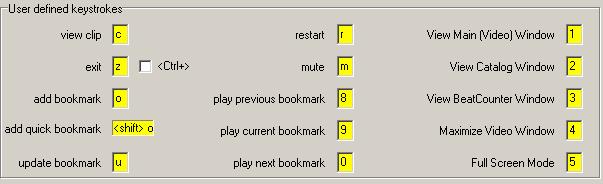
When you first start out using the keyboard, you will probably want one of the first two settings, so that all of the Player Controls are visible to remind you of which keystrokes control which functions. The keystrokes that are associated with each function are either given in the little yellow boxes, or in the mouse buttons themselves (see below):

As you get more and more comfortable with using the keyboard, you will begin to memorize which keystrokes control which functions. At this point, you will be a RPS “pro,” and you will no longer need the mouse buttons, or the keystroke reminders in the little yellow boxes, for that matter. So, when you get to this point, try setting your User Controls to “hidden.” You’ll have much more screen space for watching video. Plus, all of the keystroke controls will still be active! Of course, knowing all these commands by heart will also help you take advantage of RPS’s great Full Screen Mode (explained here).
Please Note: There are even more ways that your keyboard can help maximize the efficiently of using RPS! For more information about keyboard techniques, please click here.
Changing Keystroke Settings
As previously stated, most of RPS’s keystroke settings are given either in the little yellow boxes next to the corresponding mouse buttons, or within the ()’s embedded in the mouse buttons themselves:
![]()
RPS’s default keystroke settings were designed to be as logical as possible. However, to help you both memorize and customize your video playback commands, almost all of these default keystroke settings are changeable. Say, for example, you use the “Advanced Player Controls” a lot, but would prefer to make the keystrokes on the bottom row of keys, rather than the center row (as it is by default). No problem! All you have to do is modify the characters in the little yellow input boxes. If there is no little yellow box next to the control you want to change, go to the “Tools / Options” window, and you will find it there.
In total, there are 21 settable keystrokes:
- 7 are set directly within the ‘Player Controls’ of the Video Playback Window
- 4 are set directly in the ‘Loop Controls’ of the Video Playback Window
- 15 are set from within the ‘Options’ panel (from the Tools / Options menu item):
Please Note: When modifying keystroke controls, you can use any character you want, including numbers. However, it is important that you don’t assign the same key to more than one control. For obvious reasons, doing this will result in unpredictable and unstable behavior. Every time you open or close ReplayerStudio, the program will check to ensure that you have no redundant keystroke settings (you will get an error message if you have assigned the same key to multiple controls). However, ReplayerStudio only checks this when it is opened or closed. As such, if you are seeing erratic behavior, check to make sure you haven’t assigned the same keystroke to more than one control.
Please Note: You can reset all keystroke settings to their original default values from within the “Tools / Options” menu option. Click here for details.
The Configuration File
Every time ReplayerStudio is opened or closed, the program automatically remembers and saves nearly all of your personal user settings. For example, when you open ReplayerStudio, it remembers where on the screen you last left each window, what size you left it at, and if it was visible. ReplayerStudio also remembers such things as:
- All of your defined keystroke settings;
- Your User Control preferences (player controls visible or hidden);
- The number of frames, seconds, and minutes you had been using to jump forward and back along the timeline;
- The column widths you last set in the Video Cataloging Window;
- A few other miscellaneous settings.
Every time you exit ReplayerStudio, the program records and saves these values. ReplayerStudio then conveniently remembers them the next time you start up the program.
To do all this, ReplayerStudio writes all of this information to (and reads from) a file called “config.txt.” This important “configuration” file is kept in the same folder as “ReplayerStudio.exe” (usually “C:\Program Files\ReplayerStudio”).
Restore Default Configuration: If you would ever like to restore the settings that ReplayerStudio originally came with, you can easily do so by changing your configuration file. Click here to find out how.
Multiple Users: You can also save different settings for different users. Say, for example, that you prefer a certain set of keystrokes, a certain video window size, and a certain User Control setting, while your friend (or dance partner) prefers other keystrokes, window sizes, and settings. If you want to save and use multiple configurations for different users, do the following:
- Assume you will be User_1 and your friend will be User_2. Manually copy your configuration file, then re-name it to something like: ‘config_User_1.txt’. Doing this will preserve your settings in a new configuration file that ReplayerStudio cannot access.
- Run ReplayerStudio again, change the configuration to the settings that your friend (or dance partner) prefers, and then exit. This new configuration will be written to the original ‘config.txt’ file. To preserve these settings, copy this latest ‘config.txt’ file to another name (e.g. ‘config_User_2.txt’).
- Then, whenever you want to run a particular configuration, just copy the configuration you want to use at the time (e.g. ‘config_User_1.txt’ for you, ‘config_User_2.txt’ for your friend), and re-name it to ‘config.txt’. Just remember: whatever file is called ‘config.txt’ is the one that ReplayerStudio accesses (reads from and writes to).
Complete List of all Keyboard Controls
The following pretty much summarizes the entire functionality of ReplayerStudio:
|
KEYSTROKE |
ACTION |
Modifiable Keystroke? |
|
|
|
|
|
<Space Bar> |
Play / Pause |
No |
|
|
|
|
|
C |
View Clip |
Yes, in options window |
|
Z |
Exit |
Yes, in options window |
|
R |
Restart |
Yes, in options window |
|
M |
Mute |
Yes, in options window |
|
|
|
|
|
A |
Back X Seconds |
Yes, in yellow box next to button |
|
F |
Forward X Seconds |
Yes, in yellow box next to button |
|
S |
Back 1 Frame |
Yes, in yellow box next to button |
|
D |
Forward 1 Frame |
Yes, in yellow box next to button |
|
<Shift> + A |
Back X Minutes |
Yes, but always the <Shift> of “Back x seconds” |
|
<Shift> + F |
Forward X Minutes |
Yes, but always the <Shift> of “Forward x seconds” |
|
<Shift> + S |
Back X Frames |
Yes, but always the <Shift> of “Back 1 frame” |
|
<Shift> + D |
Forward X Frames |
Yes, but always the <Shift> of “Forward 1 frame” |
|
|
|
|
|
J |
Slow Motion |
Yes, in yellow box next to button |
|
K, <Shift + K> |
Regular Speed |
Yes, in yellow box next to button |
|
L |
Fast Motion |
Yes, in yellow box next to button |
|
<Shift> + J |
Decrease Speed by 0.1x |
Yes, but always the <Shift> of “Slow Motion” |
|
<Shift> + <Click on button> |
same as above |
No |
|
<Shift> + L |
Increase Speed by 0.1x |
Yes, but always the <Shift> of “Fast Motion” |
|
<Shift> + <Click on button> |
same as above |
No |
|
|
|
|
|
<Ctrl + J> |
Enter the “converted mode.” If already in converted mode, then slow down playback by 10% while maitaining pitch. |
Yes, but always the <Ctrl> of “Slow Motion” |
|
<Ctrl + K> |
Exit the “converted mode” |
Yes, but always the < Ctrl > of “Regular Speed” |
|
<Ctrl + L> |
Enter the “converted mode.” If already in converted mode, then speed up playback by 10% while maitaining pitch. |
Yes, but always the < Ctrl > of “Fast Motion” |
|
|
|
|
|
|
|
|
|
G |
Set Start Time |
Yes, in yellow box next to button |
|
H |
Set End Time |
Yes, in yellow box next to button |
|
<Shift> + G |
Goto Start Time |
Yes, but always the <Shift> of “Set start time” |
|
<Shift> + <Click on button> |
same as above |
No |
|
<Shift> + H |
Goto End Time |
Yes, but always the <Shift> of “Set end time” |
|
<Shift> + <Click on button> |
same as above |
No |
|
T |
Play Loop |
Yes, in yellow box next to button |
|
Y |
Play Full Video |
Yes, in yellow box next to button |
|
Button only |
Reset End Time |
No keystroke |
|
Button only |
Reset Loop |
No keystroke |
|
Button only |
Select to Loop Continuously |
No keystroke |
|
|
|
|
|
O |
Add Bookmark |
Yes, in options window |
|
<Shift> + O |
Make Quick Bookmark |
Yes, but always the <Shift> of “Add bookmark” |
|
U |
Update Bookmark |
Yes, in options window |
|
<Ctrl> + O |
Open Video Catalog or Show Video Catalog |
No |
|
|
|
|
|
8 |
Play Previous Bookmark (button is in Video Catalog window) |
Yes, in options window |
|
9 |
Play Current Bookmark (button is in Video Catalog window) |
Yes, in options window |
|
0 |
Play Next Bookmark (button is in Video Catalog window) |
Yes, in options window |
|
|
|
|
|
1 |
View Main (Video) Window |
Yes, in options window |
|
2 |
View Catalog Window |
Yes, in options window |
|
3 |
View BeatCounter Window |
Yes, in options window |
|
4 |
Maximize Video Window |
Yes, in options window |
|
5 |
Full Screen Video Mode |
Yes, in options window |
|
6 |
View DirectPlay Window |
Yes, in options window |
|
|
|
|
|
Button only |
Import Multiple Clips |
No keystroke |
|
Button only |
Toggle between Beginner/Advanced Mode |
No keystroke |
|
Button only |
Switch through various User Controls |
No keystroke |
|
|
|
|
|
Slider bar only |
Volume Control |
No keystroke |
|
|
|
|
|
Checkbox only |
Precise TimeCode display checkbox |
No keystroke |
|
Checkbox only |
BeatCounter Panel checkbox |
No keystroke |
|
Checkbox only |
BeatCounter big display checkbox |
No keystroke |
|
|
|
|
|
<F1> |
Open User Manual |
No (no button exists) |
|
<F5> |
Shrink Main Window |
No (no button exists) |
|
<F6> |
Enlarge Main Window |
No (no button exists) |
|
|
|
|
|
<F7> |
Paste Command Line (Advanced – Command Line Entry) |
No |
|
<F8> |
Play Command Line (Advanced – Command Line Entry) |
No |
|
|
|
|
|
<Page Up> |
Play Previous Clip in Same Directory |
No |
|
<Page Down> |
Play Next Clip in Same Directory |
No |
|
|
|
|
|
<Ctrl> + P |
Toggle Locking to Original Clip Size |
No (no button exists, just in main menu pulldown) |
|
<Ctrl> + I |
Display Video File Info |
No (no button exists, just in main menu pulldown) |
|
<Ctrl> + Q |
Display Options Window |
No (no button exists, just in main menu pulldown) |
|
|
|
|
|
<Ctrl> + <Shift> + 9 |
Force Play (for Skydiving users) |
No |
|
<Ctrl> + <Shift> + 0 |
Force Pause (for Skydiving users) |
No |
|
|
|
|
|
BeatCounter stuff: |
|
|
|
` |
Mark (record TimeCode) |
No |
|
< (without <Shift>) |
Jump to the Previous Beat |
No |
|
> (without <Shift>) |
Jump to the Next Beat |
No |
|
< (with <Shift>) |
Jump to the Previous “1” Count |
No |
|
> (with <Shift>) |
Jump to the Next “1” Count |
No |
|
|
|
|
|
|
|
|
|
Video Catalog Window: |
|
|
|
<Enter> or <DoubleClick> in Play cell |
Play Bookmark |
No |
|
Arrow Keys |
Move around in Bookmarks Grid |
No |
|
<Enter> or <DoubleClick> In Other cells |
Edit Cell Contents |
No |
|
Select left-most cell & <Del> |
Delete Bookmark |
No |
|
|
|
|
|
|
|
|
|
<Shift> + <Enter> |
In End Time Cell, Jumps to End Time of Bookmark |
No |
|
<Shift> + <Enter> |
In any Other Cell, Jumps to Start Time of Bookmark |
No |
|
<Shift> + <Mouse Click> |
Works the same for the two above |
No |
|
|
|
|
|
<Ctrl> + O |
Open Video Catalog |
No |
|
<Ctrl> + S |
Save Video Catalog |
No |
|
<Ctrl + Shift> + S |
Save as Video Catalog |
No |
|
<Ctrl> + W |
Close Video Catalog |
No |
|
|
|
|
|
Button only |
Adjust Bookmark Grid Spacing |
No keystroke |
|
Button only |
Toggle Sorting On & Off |
No keystroke |
|
Button only |
Play All Bookmarks |
No keystroke |
|
Button only |
Hide Video Catalog |
No keystroke |
|
|
|
|
|
<Tab> |
Toggles between Description Box and Bookmarks Grid |
No |
Section VI. Using ReplayerStudio’s Bookmark Controls & Cataloging Features
Definitions of Terms
First, a little terminology to make everything clear:
· A loop is simply a scene/section of a larger video file that has a start time, and, optionally, an end time:

· A bookmark is a loop that is named, and optionally contains a description and some other attributes (rating, etc.):
![]()
· A video catalog is a file containing a collection of bookmarks.
In addition:
· A video catalog is saved as either a .rps file (“rps” stands for “RePlayerStudio”) or, optionally, as a .csv file (comma separated file – used for spreadsheet applications like Excel.)
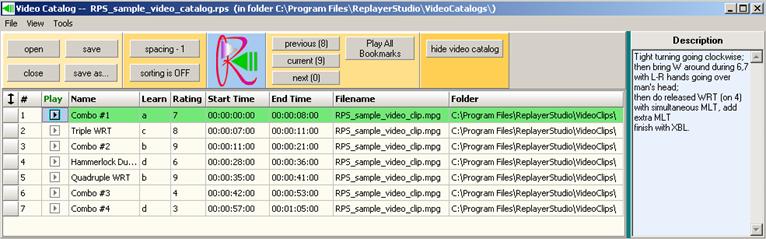
· The Video Cataloging Window (or, more simply, the “Cataloging Window”) (shown below) is composed of three sections. Most importantly, there is the Bookmarks Grid, which occupies the lower left section of the window. Designed like a spreadsheet, this section contains all of the bookmarks you have defined within one .rps video catalog file. Each row in the Bookmarks Grid represents a bookmark. The second section is the Description Field, which contains detailed text that describes each bookmark. The third section is the yellow and orange upper control bar, which contains various mouse buttons that enable you to open, close, play, save, and organize your bookmarks.
· We use the terms cataloging and bookmarking somewhat interchangeably in this manual. They actually refer to the same activity—recording and noting specific scenes within your video files. However, there is a distinction between the terms catalog and bookmark, when used as a noun. Please keep in mind this important definition: a video catalog is a file containing a collection of individual bookmarks.
For more information about video cataloging features, you might want to consult the ReplayerStudio Product Tour:
www.ReplayerStudio.com/product_tour_cataloging.htm
Creating Bookmarks
To
create a bookmark (and save it to a new video catalog file), first open a video
clip from within the Video Playback Window (RPS’s main window.) Then, define a
loop using the Loop Controls (described above).
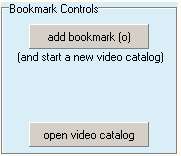
To bookmark your loop into a video catalog, simply press ![]() (or
press the ‘o’ key) within the Bookmark Control Panel of the Video
Playback Window. A small pop-up window will appear:
(or
press the ‘o’ key) within the Bookmark Control Panel of the Video
Playback Window. A small pop-up window will appear:
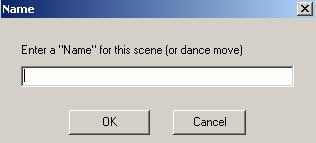
You may enter a name for this scene (or dance move) within this pop-up window, or skip this step for now by just pressing ‘OK’ (or hit <Enter>). ReplayerStudio will then open the Video Cataloging Window, and will add your new bookmark into the bookmarks grid. You have now created a bookmark!
Creating a “Quick Bookmark”: If you are viewing a large video file and need to quickly create several bookmarks, you may want to use this feature. No loop needs to be defined. A Quick Bookmark is created by simply pressing <Shift+O> and it will add a bookmark to the Bookmarks Grid recording only the current playback time as the Start Time. (The EndTime will be blank and no Bookmark name will be assigned. You can go back and add these later.) Then, simply press <spacebar> to continue playback.
For more information about efficiently creating bookmarks, please click here.
Adding an “Category” column to the Bookmarks Grid: In many cases entering a name is enough information to identify a bookmark. You can also enter a long-as-you-like description for each bookmark to further identify the bookmark. However, if you want to organize your bookmarks into different “categories”, you can add a category column as well. Click here for a full explanation on how to use this feature.
Opening and Modifying Previously Saved Catalog Files & Bookmarks
You
can also open a previously saved video catalog file from within the Video
Playback Window. Just press ![]() (or press <Ctrl+O>),
which is located within the Bookmark Controls Panel. When you have a catalog
file open, the Bookmark Controls Panel changes.
(or press <Ctrl+O>),
which is located within the Bookmark Controls Panel. When you have a catalog
file open, the Bookmark Controls Panel changes.
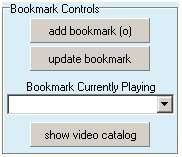
Specifically, a drop-down menu appears within this panel. You will find all of the individual bookmarks saved in the open catalog file listed within this drop-down menu. To play one of these bookmarks, simply select it from the drop-down list (this will put you in Play Loop Mode; see above for details.)
Adding
New Bookmarks to an Open Catalog File: You can also add new bookmarks to an
open video catalog. Just do exactly as described in the Create Bookmarks
section above: use the Loop Controls to define a loop, then press ![]() , or the ‘o’
key. You will again be prompted to enter a name for the new bookmark. Your
new bookmark will then be added to the bottom of the Bookmarks Grid within the
Cataloging Window (and also to the drop-down menu within the Bookmark Controls
of the Video Playback Window.) If you don’t want this newly created bookmark to
be the last bookmark in the grid, you can simply change the order of bookmarks
by either moving a bookmark (click here for details)
or by sorting bookmarks (click here for details.)
, or the ‘o’
key. You will again be prompted to enter a name for the new bookmark. Your
new bookmark will then be added to the bottom of the Bookmarks Grid within the
Cataloging Window (and also to the drop-down menu within the Bookmark Controls
of the Video Playback Window.) If you don’t want this newly created bookmark to
be the last bookmark in the grid, you can simply change the order of bookmarks
by either moving a bookmark (click here for details)
or by sorting bookmarks (click here for details.)
Re-Defining Start and End Times of Bookmarks within an Open Catalog File: There are three ways to change the start and end time of a bookmark:
1. You can re-define
bookmarks in an open video catalog file by first playing a bookmark, then by
changing its start and/or end time(s) using the ![]() and
and ![]() buttons in the Loop
Controls. Once you have set the start and/or end time(s) to your new desired
value(s), simply press the
buttons in the Loop
Controls. Once you have set the start and/or end time(s) to your new desired
value(s), simply press the ![]() button to save the changes to your video
catalog file.
button to save the changes to your video
catalog file.
2. If you already know the
start and/or end time that you want to change the bookmark to, you can directly
edit the time code boxes within the Loop Controls Panel,  , and then press the
same
, and then press the
same ![]() button.
button.
3. You can also directly edit the start and end times from within the bookmarks grid of the Cataloging Window (see below for more information.)
Annotating Bookmarks Using the Bookmarks Grid and Description Field
After creating a bookmark, you may want to annotate and describe it. The bookmarks grid within the Cataloging Window contains several columns that help you do this. Once again, this grid works like a spreadsheet. Your arrow keys allow you to move your cursor to different cells within this grid. However, unlike a spreadsheet, you cannot merely type over a cell. Instead, when you come to a cell you want to edit, either press the <Enter> key, or double click with your mouse, to get into edit mode. Now you can change the text in the cell. Simply press <Enter> again to get out of edit mode.
Please Note: While in edit mode, you can always press the <Esc> key to discard your changes and restore the original contents of the cell.
Here are the various columns that ReplayerStudio provides:
·
The Learn
column, ![]() , was designed
especially for dancers. It indicates how well you’ve learned the dance move
that you bookmarked. (If you can think of another use for this column besides
studying dance video, please let us know!). The Learn column provides a menu
with four possible letter choices (from ‘a’ to ‘d’). Again,
highlight the cell you want to change, then press <Enter>
(or double-click) to get into edit mode. Then, choose from the following options
using your arrow keys:
, was designed
especially for dancers. It indicates how well you’ve learned the dance move
that you bookmarked. (If you can think of another use for this column besides
studying dance video, please let us know!). The Learn column provides a menu
with four possible letter choices (from ‘a’ to ‘d’). Again,
highlight the cell you want to change, then press <Enter>
(or double-click) to get into edit mode. Then, choose from the following options
using your arrow keys:
a = need to learn
b = learning
c = almost mastered
d = mastered
(Of course, the letters a, b, c, and d can mean whatever you want them to mean.)
While in edit mode, you can also simply type in
the letter that you want, or click on the ![]() icon to activate the
drop down menu.
icon to activate the
drop down menu.
·
The Rating
column, ![]() , again, was designed
for dancers, but could be used by anyone. Specifically, it indicates the
“coolness” factor of the dance move (or bookmarked scene). Highlight the cell
you want to edit, use the <Enter> key to get into edit
mode, then use the up and down arrow keys on your keyboard to select a rating
on a scale from ‘0’ to ’10’.
, again, was designed
for dancers, but could be used by anyone. Specifically, it indicates the
“coolness” factor of the dance move (or bookmarked scene). Highlight the cell
you want to edit, use the <Enter> key to get into edit
mode, then use the up and down arrow keys on your keyboard to select a rating
on a scale from ‘0’ to ’10’.
While in edit mode, you can also simply type in
the rating you want, or use the spin edit icon (![]() ) to move
through all the possible values.
) to move
through all the possible values.
The Rating column is useful because it allows you to prioritize your bookmarks based on how much you like the scene (or dance move). For example, you can sort your bookmarks by Rating (see the section on sorting below).
· The next column in the Bookmarks Grid is the Play column. Cells in Play column cannot be edited or changed. Please see the Play Bookmarks sections below for a detailed description of the Play column.
· Next are the Start Time and End Time columns. These two columns simply denote the loop definition of the associated bookmark. If you want to change a start or end time of a bookmark, you can do so by highlighting the cell and then changing it manually. To remove the end time of a bookmark (which, by definition means that the end of the video clip will now be the end time), manually enter this exact sequence into the End Time column: “--:--:--”.
· Next are the Filename and Folder columns. These columns indicate the filename and directory of the video clip from which that loop was defined. You should probably not edit any of the cells in this column, because doing so can cause ReplayerStudio to be unable to find or reference your bookmarks.
· Finally, there is the Description column. Actually, the Description column isn’t a column at all, but a very large field that takes up the entire right side of RPS’s Cataloging Window. It is colored in light blue:
Like the Learn and Rating columns, the Description field is optional. You can leave it blank if you want to. But you always have the option of adding as much text to this field as you want. There is plenty of space to annotate your bookmarked scene, which can be very useful when learning a complicated dance move, for example. Keep in mind that you can edit this field at any time. You can create a bookmark with only a name, and then at some future time describe the scene by adding (or changing the) text to this field.
To enter, edit, or view a description in the Description field, simply select a bookmark by placing your cursor into any cell in a given row, using either your arrow keys or your mouse. It does not matter which cell you highlight so long as it is in the row corresponding to the bookmark you want to describe (the Description field automatically changes only as you move your cursor up or down within the Bookmarks Grid). You can then either use your mouse to click into the blue Description field, or you can press the <Tab> key, which automatically moves your cursor into and out of the Description field. Once you are in edit mode, you can enter almost any character in the Description field (other than tabs!).
Play Individual Bookmarks
There are three ways to play back previously defined bookmarks:
Method #1: Directly from within the Bookmarks Grid
Double click the boxed arrow icon in the ‘Play’
column, ![]() , of the bookmark you
wish to view. You can also highlight this cell with your arrow keys,
, of the bookmark you
wish to view. You can also highlight this cell with your arrow keys, ![]() , then hit <Enter>
to play the bookmark.
, then hit <Enter>
to play the bookmark.
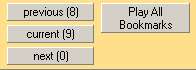
Method #2: Indirectly from within the Upper Bookmarks Control Panel
You can also use the  buttons to play
bookmarks (located in the orange panel at the top of the Video Cataloging
Window). By pressing
buttons to play
bookmarks (located in the orange panel at the top of the Video Cataloging
Window). By pressing ![]() (or the ‘9’
key), playback will begin with the currently selected bookmark.
(or the ‘9’
key), playback will begin with the currently selected bookmark.
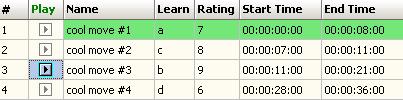
Please Note: The currently selected bookmark is always denoted by the cell highlighted in blue within the bookmarks grid (Bookmark #4 in the graphic below). By contrast, the currently playing bookmark is always highlighted in green (Bookmark #2 in the graphic below). Remember, you can always select a new bookmark while a different bookmark is playing! It is important to remember when using the play previous, current, and next bookmark buttons, that these buttons use the bookmark currently selected as the reference point, not the bookmark currently playing.
You can skip to the next bookmark by pressing the ![]() (or the ‘0’
key). In the example above, Bookmark #5 would play, since that is the next
bookmark after the one currently selected. Jump back to the previous
bookmark by pressing the
(or the ‘0’
key). In the example above, Bookmark #5 would play, since that is the next
bookmark after the one currently selected. Jump back to the previous
bookmark by pressing the ![]() (or the ‘8’
key). This would play Bookmark #3 in the example above, since that is the
previous bookmark from the one currently selected. To re-start the
current bookmark, press
(or the ‘8’
key). This would play Bookmark #3 in the example above, since that is the
previous bookmark from the one currently selected. To re-start the
current bookmark, press ![]() (or the ‘9’
key) again; this will actually play Bookmark #4 in the example above, since
that is the one currently selected.
(or the ‘9’
key) again; this will actually play Bookmark #4 in the example above, since
that is the one currently selected.
Please Note: The keystrokes ‘8’, ‘9’, and ‘0’ work not only from within the Cataloging Window, but from any window. So, you can use these keystrokes from within the Video Playback Window, as well.
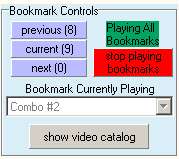
Method #3: Indirectly from within the Video Playback Window
Once you have defined and described all of your bookmarks, you may not want to bother with the Cataloging Window at all. Impressively, ReplayerStudio enables you to have complete access to all of your bookmarks from the Video Playback Window, as well.
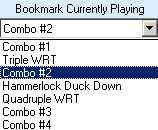
Within the Bookmark Controls Panel is a pull-down menu called ‘Bookmark Currently Playing’:
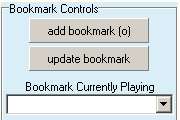
Each bookmark listed in the bookmarks grid also appears in this pull-down menu. Simply select your desired bookmark from this pull-down list, and it will play!
Please Note: The ‘Bookmark Currently Playing’ menu box will be updated, even if you select a bookmark another way (from within the Bookmarks Grid directly, or using the “previous”, “current”, and “next” functions).
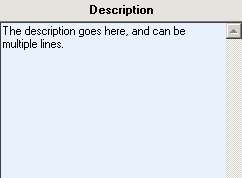
You can also view the description of the bookmark currently playing from within the Video Playback Window. The description is shown in a memo box, which is located directly below the Bookmark Controls Panel:
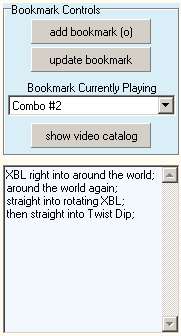
The description of your bookmarks will update as you play them (however, you cannot edit or modify the descriptions from within this box; you must go into the Video Cataloging Window to do that). This feature allows you to see the description of your bookmark at the same time that you watch it, which may be especially useful if you’ve taken valuable notes and want to view them along with the video (as, for example, when learning a complicated dance move).
Please Note: If you have a very small screen, you may need to set the User Controls to “Hidden” (click here for more details) and/or make your Video Playback Window very tall in order to see the description memo box.
Additional Video Cataloging Features
- Open, Save, Save As, & Close Catalogs
In the upper-left corner of the
Cataloging Window, embedded in the control panel are these buttons: 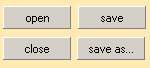 . You can use them to open,
close, save, and ‘save as’ your ReplayerStudio
video catalog file (<Ctrl+O>, <Ctrl+W>,
<Ctrl+S>, and <Shift+Ctrl+S> work as
well – see the File menu in the Video Cataloging Window). If you
make changes to a catalog file, then try to close it without saving it, you will
be prompted to save it before exiting.
. You can use them to open,
close, save, and ‘save as’ your ReplayerStudio
video catalog file (<Ctrl+O>, <Ctrl+W>,
<Ctrl+S>, and <Shift+Ctrl+S> work as
well – see the File menu in the Video Cataloging Window). If you
make changes to a catalog file, then try to close it without saving it, you will
be prompted to save it before exiting.
- Change the Cell Spacing within the Bookmarks Grid
ReplayerStudio offers two
cell-spacing options. Option #1 shows one line of text in the grid, while
Option #2 shows two lines of text in the grid. Just press the ![]() button
in the upper control panel to toggle between these two options.
button
in the upper control panel to toggle between these two options.
- Resize Bookmark Grid Column Sizes
You can adjust the size of the (Bookmark) Name and Filename in the Bookmarks Grid. Do to so, simply place the mouse pointer to the right-hand edge of the corresponding column, click and hold down, and then drag to re-size. You can also simply double click on the column edge, and the column will automatically adjust its width to show all the data.
To adjust the width of the Folder
column, simply move the green bar, 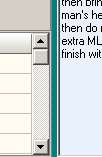 , which separates the
bookmarks grid from the description memo box. Of course, this will also adjust
the size of the description box. In addition, you can adjust the width of the
entire (cataloging) window to shrink or expand the description box.
, which separates the
bookmarks grid from the description memo box. Of course, this will also adjust
the size of the description box. In addition, you can adjust the width of the
entire (cataloging) window to shrink or expand the description box.
Please Note: ReplayerStudio will store all of your designated column widths (using the configuration file), so that the next time you start the program, these settings will be remembered.
- Delete a Bookmark
Select the entire row of the bookmark
by placing your cursor into the ‘#’ column, ![]() . The entire bookmark
will be highlighted in blue (the whole row):
. The entire bookmark
will be highlighted in blue (the whole row):
![]()
Then simply hit the <Delete> key.
To change the order of bookmarks
within the grid, simply place your mouse into the ‘↕’ column, ![]() , of the bookmark you
want to move. Then, just drag and drop the row to the desired location within
the grid.
, of the bookmark you
want to move. Then, just drag and drop the row to the desired location within
the grid.
Press the ![]() button in
the upper control panel so it says
button in
the upper control panel so it says ![]() . Then, simply click on
a column header to sort your bookmarks list by that column. To sort by multiple
columns, hold down the <Shift> key as you select column
headings. ReplayerStudio will sort your bookmarks by all the columns you
select, in the order in which you select them (small numbers highlighted in
yellow will appear in the column headings to designate the sorting order you
chose).
. Then, simply click on
a column header to sort your bookmarks list by that column. To sort by multiple
columns, hold down the <Shift> key as you select column
headings. ReplayerStudio will sort your bookmarks by all the columns you
select, in the order in which you select them (small numbers highlighted in
yellow will appear in the column headings to designate the sorting order you
chose).
One way to un-sort the bookmarks
is to sort on the first column, ![]() . In theory, this will
re-order your bookmarks as you had them originally. However, this is really
another re-sort, and will not simply undo your previous sorting. So, take care
when doing this!
. In theory, this will
re-order your bookmarks as you had them originally. However, this is really
another re-sort, and will not simply undo your previous sorting. So, take care
when doing this!
- The number column,
 , will not
re-number itself as you delete, change the order of, and sort
bookmarks. If you want to reset the numbers so they read sequentially, simply
save and then re-open the video catalog file.
, will not
re-number itself as you delete, change the order of, and sort
bookmarks. If you want to reset the numbers so they read sequentially, simply
save and then re-open the video catalog file.
- Toggle Between Video Playback & Cataloging Windows
The “3” key toggles between RPS’s Video Playback and Cataloging Windows.
In additioin, you can also press ![]() to hide the Cataloging
Window, and the corresponding button,
to hide the Cataloging
Window, and the corresponding button, ![]() (in the Bookmarks
Control Panel of the Video Playback Window), to bring the Cataloging Window
back into view.
(in the Bookmarks
Control Panel of the Video Playback Window), to bring the Cataloging Window
back into view.
- Print the Bookmarks Grid
You can print the Bookmarks Grid if you like. This could be useful for a variety of reasons. For example, if you don’t take your computer with you, you can at least take along a list of all the scenes/dance moves to discuss/practice and make written notes.
Under the main menu of the video cataloging window, select “File/Print/Grid/” and then choose either “Without Description” or “With Description.”
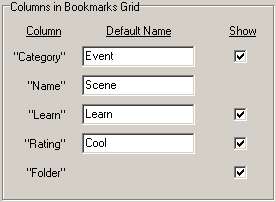
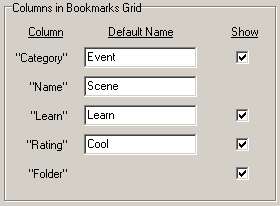
- Changing the names of the Columns
You can change the name of the first four column headings:
![]()
To do this, simply click on the double click on column header to change its name. (For example, double click in the space in the space where it says, “Category”.) You will then be prompted to enter a new name for the column. By doing this for most of the four columns, you can have the Bookmarks Grid appear as:
![]()
You may want to have different column heading depending on what type of video you are bookmarking.
Also, you can suppose you want to change the default columns names, so that you don’t have to manually type in new column names every time you create a new video catalog file. (This could be very useful if you read a language other than English or if you have your own idea as to column names.) To do this, open up the Options window (Tools / Options) and select the Cataloging tab. You will see the following:
Simply enter in new default column names, and then when you create a new video catalog file, they will be initially be assigned with these column headings.
- Adding a “Category” column to the Bookmarks Grid
To “turn on” the Category column, first open up the Options window (Tools / Options) and select the Cataloging tab. You will see the following:
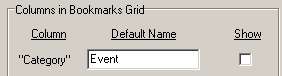
Simply check the box under “Show.” Then the Bookmarks Grid will add this column as shown here:

Now, after pressing ![]() , the pop-up
will appear as:
, the pop-up
will appear as:
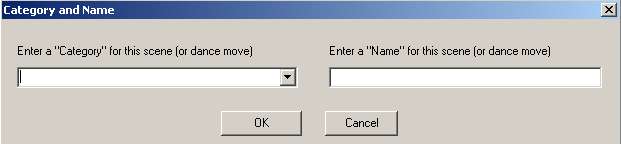
This window is also very keyboard friendly. Pressing <Enter> will take you from the “Category“ entry box to the “Name” entry box, and pressing <Enter> again will save your changes and place them in the Bookmarks Grid. If you don’t want to enter any names, simply press <Enter> twice. Also the “Category” enter box has a pull-down that allows you to select from “Categories” previously entered. It also has “auto-completion” so that you can start typing the name of the “Category” and it can complete the name for you.
Hiding repeating “Category” names:
By pressing the button, ![]() , you can hide
consecutively appearing category names. Why would you want this feature? Well
it can make the Bookmarks Grid easier to read.
, you can hide
consecutively appearing category names. Why would you want this feature? Well
it can make the Bookmarks Grid easier to read.
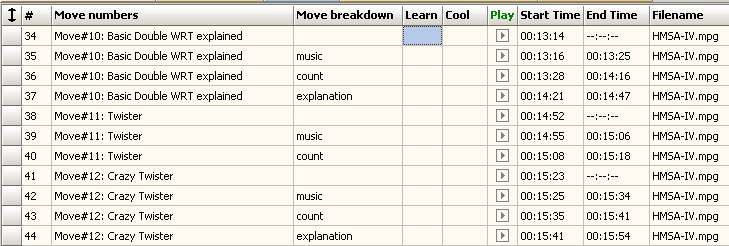
For example, if you have: (The “Category” column was renamed to “Move numbers” and the “Name” column was renamed to “Move breakdown”)
By selecting to hide repeats, it will appear as:
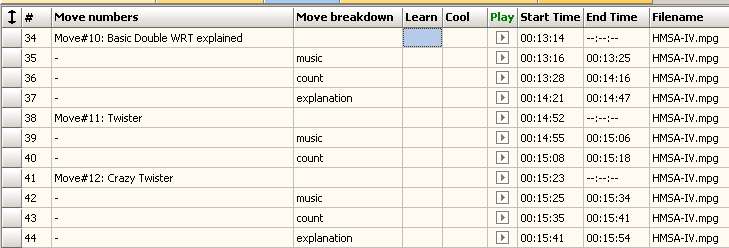
(At any time by pressing the button again, all of the hidden category names will re-appear.)
In fact, we suggest organizing your video catalog files in this manner. This way, sorting will become very efficient. With this arrangement, by simply sorting on the “Move breakdown” column (and then doing a secondary sort on the “Move numnbers” column, the Bookmarks Grid will appear as follows:
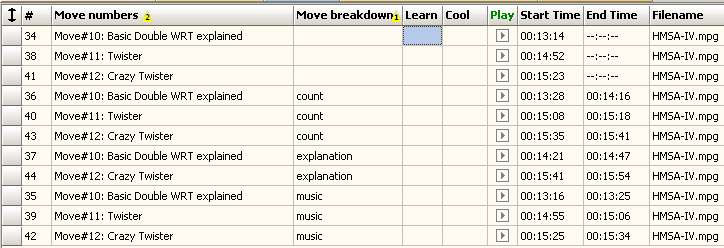
Now you will have a list of the entire video ordered by the beginning of each move in one section of the list. And have another section of the list with the “counts” of all the moves available, and a list of all the moves done to “music” available. In other words, once you have bookmarked the entire video, you can arrange the video catalog file so you can watch the video in any order you want, not how the video producer ordered it!
- Hiding Columns
If you don’t have need for certain columns, or simply want to save space (the Bookmarks Grid can be very long horizontally), you can hide them at any time. This can be especially useful for smaller monitors.
Open up the Options window (Tools / Options) and select the Cataloging tab. You will see the following:
Simply uncheck the boxes corresponding to the columns you don’t need to see at this time. ReplayerStudio and the video catalog file itself will not lose this information -- it simply just won’t be displayed, and you can bring the column back intact with all the information at any time.
Play All Bookmarks Mode
You can play all of the bookmarks in your video catalog
file, in sequence, without stopping between bookmarks. Simply press ![]() , and playback will
begin with the currently selected bookmark. As mentioned previously, the
currently selected bookmark is designated by the row (or a single cell in a
row) that is highlighted in blue, and this is not necessarily the bookmark
that is currently playing (the bookmark highlighted in green in the
bookmarks grid is the one that is currently playing). When in ‘Play All
Bookmarks’ mode, you can skip to the next bookmark by pressing
, and playback will
begin with the currently selected bookmark. As mentioned previously, the
currently selected bookmark is designated by the row (or a single cell in a
row) that is highlighted in blue, and this is not necessarily the bookmark
that is currently playing (the bookmark highlighted in green in the
bookmarks grid is the one that is currently playing). When in ‘Play All
Bookmarks’ mode, you can skip to the next bookmark by pressing ![]() (or the ‘0’
key), skip to the previous bookmark by pressing
(or the ‘0’
key), skip to the previous bookmark by pressing ![]() (or the ‘8’
key), or re-start the current bookmark by pressing
(or the ‘8’
key), or re-start the current bookmark by pressing ![]() (or the ‘9’
key).
(or the ‘9’
key).
Please Note: The ‘Play All Bookmarks’ mode only tells ReplayerStudio to play all of the bookmarks in the catalog file continuously, without stopping between them. It is still possible to select individual bookmarks when in this mode. Doing this would cause ReplayerStudio to skip one or several bookmarks in the case that you select a different bookmark from the one currently playing, and then press any of the ‘next,’ ‘current,’ or ‘previous’ buttons.
To get out of ‘Play All Bookmarks’ mode simply press
the same button which started the process, which now appears as ![]() .
.
Please Note: When in ‘Play All Bookmarks’ mode, the same control buttons also appear within the Bookmarks Control Panel of the Video Playback Window:
The description of each move will even appear in a memo box located directly below these controls (as explained above). So, you really don’t need the Cataloging Window to use this feature.
Section VII. Exporting Video Catalog Files to Word Processor and Spreadsheet Applications
Maintaining Video Catalogs in Other Applications
ReplayerStudio offers two file formats for storing video catalogs. The first is, “.rps”.It is a special format used by ReplayerStudio but is simply a text file and can be easily read by anyone. The other, “.csv”, is a file of “Comma Separated Values” that is normally read by spreadsheet applications. ReplayerStudio can use either of these formats to populate the bookmarks grid in the Video Cataloging Window. While the bookmarks grid offers many useful features, such as the ability to edit, describe, sort, rate, and play your individual bookmarks (see the Video Cataloging section above), some users may prefer to use other more powerful applications such as word processors or spreadsheets to maintain and playback their bookmarks.
Both of RPS’s video catalog formats can be opened or imported into other applications:
· You can open your .rps catalog file(s) using various text editing and word processing applications such as Notepad, Microsoft Word, and many others. The advantage of using such applications is that you can edit, annotate, format, and manage your bookmarks using the features unique to those programs.
· You can open your .csv catalog file(s) using spreadsheet applications such as Microsoft Excel, where you can edit, annotate, and manage your bookmarks using the features of that program.
For some examples of the formatting you can do using word processors or spreadsheet applications, check out:
www.ReplayerStudio.com/product_tour_cataloging.htm
Then click on either of these links:
Create catalog files that can be opened with common spreadsheet applications (such as Microsoft Excel).
Customize your catalog files using common word processors (such as Microsoft Word).
Using the Command Line Entry
Using ReplayerStudio’s internal “Command Line Entry” window
There is a easier and better method now. The section, “Using macros to play Bookmarks at the touch of a button”, explains this faster method. However, it is necessary to read everyting in order, so that you will understand this method.
ReplayerStudio’s Command Line Entry is an advanced playback feature located under the ‘Tools’ menu of the Video Playback Window. This feature is used for playing individual bookmarks from other applications such as Notepad, Word, or Excel.

Whether you use text editors or word processors to maintain your video catalogs is entirely up to you. ReplayerStudio was designed to be as flexible as possible, so if you prefer text editors, maintain your catalogs in .rps format. If you prefer spreadsheets, use .csv.
Either way, this is where the Command Line Entry feature comes in. If you prefer to open, view, and maintain your catalog files using these other applications, you can still play the bookmarks in ReplayerStudio! Simply copy and paste the text containing the start time, end time, file name, and folder location into the Command Line Entry input line, and then play the bookmark in ReplayerStudio. This allows you the flexibility of using other applications to organize your bookmarks, while still enjoying all of the video playback features ReplayerStudio has to offer.
Important: The format of the start time, end time, file name, and folder location cannot deviate from the original format, or ReplayerStudio will not be able to read the command. For this reason, we recommend the following:
·
From
within a spreadsheet such as MS Excel, simply copy all four cells
containing the start time, end time, file name, and folder location of
a bookmark, then paste this command into RPS’s Command Line Entry window. You
can use <Ctrl+C> to copy the cells, then <Ctrl+V>
to paste, or just paste the text by pressing the ![]() button, or by pressing
the <F7> key. Once pasted, you can then play the bookmark by pressing
the
button, or by pressing
the <F7> key. Once pasted, you can then play the bookmark by pressing
the ![]() button, or by pressing the <F8>
key. This is explained in much more detail below.
button, or by pressing the <F8>
key. This is explained in much more detail below.
· From within a text editor such as Notepad or Word, do the same: copy all of the text designating the start time, end time, file name, and folder location of a bookmark, and paste as described above. (All of this information appears on one line in the .rps catalog file.) This is explained fully below.
Manually Formatting Bookmarks: Reading & Writing Video Catalog Files from Other Applications
.rps Video Catalog File: Text Editor/Word Processor version
If you double click on a .rps file from within a folder, it will launch ReplayerStudio. However, you can also open .rps files using text editors such as Notepad (one way to do this is to right-click on the file icon, then choose the “open with” option, then select ‘Notepad’ from the menu list). This is what a .rps file looks like when opened in Notepad:
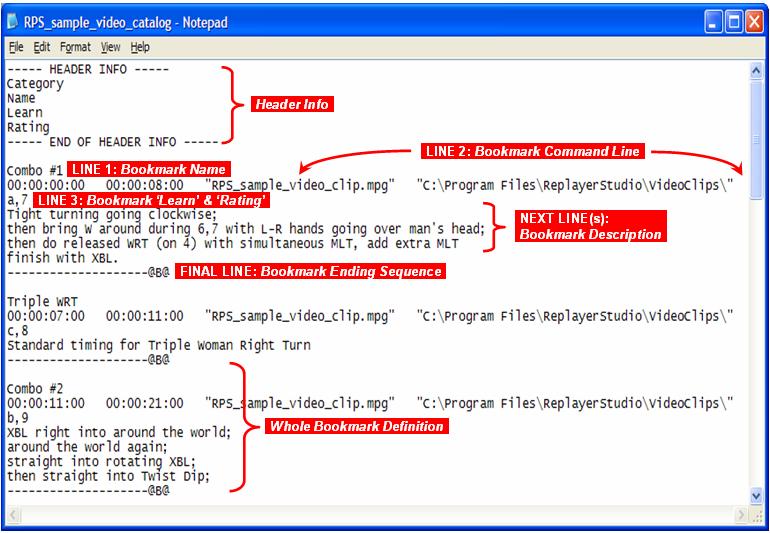
HEADER INFO:
This first six lines of any .rps file must appear as follows:
- The first line must appear exactly as “----- HEADER INFO -----“
- The next line is the column header name for the “Category” column. This defaults to “Category” but you can rename it to appear as anything you wish.
- The next line is the column header name for the “Name” column. defaults to “Name” but you can rename it to appear as anything you wish.
- The next line is the column header name for the “Learn” column. This defaults to “Learn” but you can rename it to appear as anything you wish.
- The next line is the column header name for the “Rating” column. defaults to “Rating” but you can rename it to appear as anything you wish.
- The last line must appear exactly as “----- END OF HEADER INFO -----“
After the Header Info section, each Whole Bookmark Definition appears as follows:
LINE 1: Bookmark Category
The “Category” that this Bookmark belongs to – appears in the “Category” column (or to whatever you have renamed this column in the Bookmarks Grid.)
LINE 2: Bookmark Name
The “Name” of this bookmark – appears in the “Name” column (or to whatever you have renamed this column in the Bookmarks Grid.)
Defined as follows:
Start Time, --some spaces--, End Time, --some spaces--, “Filename”, --some spaces--, “Folder”
- From the example just above, we have:
![]()
- This is the only line that is used for the Command Line Entry. As such, you should be very careful when editing or formatting this line. Keep in mind the following:
- If there is no End Time defined, then “End Time” must read exactly “--:--:--”.
- “Filename” must end with a file format extension, such as “.mpg”.
- “Folder” name must end with a “\”
- “Filename” and “Folder” must be surrounded by quotes (“xxx”) if the Filename or Folder contains any spaces.
- “--some spaces--” means any number of spaces and/or tabs. ReplayerStudio always writes out catalog files with three spaces between each field, but you can later change this to how ever many spaces and/or tabs you want (which is useful when managing bookmarks in Notepad, Word, etc.).
- You must maintain these formatting rules to enable the Command Line Entry feature to work!
LINE 4: Bookmark ‘Learn’ & ‘Rating’
- “Learn” is a letter that refers to the level of mastery selected and can be blank (“--space--”) or be “a,” “b,” “c,” or “d”.
- “Rating” is a number that refers to the rating of the scene and can be blank or “1” through “10”
NEXT LINE(s): Bookmark Description
- If there is no description, this will be one empty line.
- The description can take up multiple lines.
FINAL LINE: Bookmark Ending Sequence
A string that needs to read exactly “--------------------@B@”
- This line indicates the end of the bookmark, and is defined as a string of 20 dashes (“-”) followed by the sequence “@B@”.
- Make sure that the last bookmark has this string too, or there will be BIG problems!
You can take this text and format it the way you want (in a simple text file or in a word processor such as Word). Just make sure to leave the Bookmark Command Line (3rd) line intact. Any of the other lines can be changed in any way you want (you can even delete them altogether). However, once you change the file format (for example, by saving it to the “.doc” format, or any other format besides “.rps”), then ReplayerStudio will no longer be able to open this file. Instead, you will have to use the Command Line Entry feature to play your bookmarks (or run the easier ReplayerStudio MS Word Playback Macro.) Do as follows:
1. Select and highlight the entire 3rd line (Bookmark Command Line) with your mouse.
2. Copy the contents of the line onto the clipboard (<Ctrl+C>).
3. Switch to the ReplayerStudio application (<Alt+Tab>).
4. Press the “paste command line” and “play command line” buttons in the Command Line Entry Window. Even faster, simply press ‘u’ then ‘i’ on your keyboard. (Note that you can simply press ‘u’ and then ‘i’ even without the Command Line Entry Window open, and it will still work!)
.csv Video Catalog File: Spreadsheet Version
The format of this type of video catalog file is much more self-explanatory. It looks almost identical to the bookmarks grid itself. The following graphic shows how this video catalog file would appear from within MS Excel:

Unlike with .rps files, .csv files will launch Excel when they are double-clicked. So, if you want to open a .csv file using ReplayerStudio, you will have to either open it from within RPS, or right-click on the file icon to get to the “open with file” menu.
Creating Video Catalog Files in the .csv Format
When you create a video catalog file in RPS, the default catalog file format is “.rps” To create and save your video catalog in the “.csv” file format, simply press the “save as …” button (or “save” if the file is new), and select “Excel Style Catalog (*.csv)” under the “Save as type:” pull-down, as shown just below:
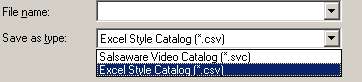
Using .csv Files
To properly format a .csv file properly within MS Excel so it is easier to read:
1. Click on the very first cell in the spreadsheet (far upper-left corner). This will cause the entire spreadsheet to be selected and highlighted.
2 Double-click between the A and B column headers. This will open all column widths to the optimum value so that all the text can be seen in each cell.
3. If necessary, manually increase the width of the “Description” so that it is equal to that of the largest line in the spreadsheet.
4. Then click again on the very upper-left hand corner to re-select the entire spreadsheet.
5. Now double-click between the row headers “1” and “2”. This will open up all the rows so that you can see all the text vertically.
6. Finally, save the spreadsheet as an .xls file to preserve this formatting (for read only; ReplayerStudio cannot read .xls files directly).
To play back your bookmarks from your Excel spreadsheet, do the following (from either a .csv or .xls file): (or run the easier ReplayerStudio MS Excel Playback Macro.)
1. Highlight the four cells spanning the “Start Time” and “Folder” columns.
2. Copy the contents to the clipboard (<Ctrl+C>).
3. Switch to the ReplayerStudio application (<Alt+Tab>).
4. Press the “paste command line” and “play command line” buttons in the Command Line Entry Window. Even faster, simply press <F7> then <F8> on your keyboard. Note that you can simply press <F7> and then <F8> even without the Command Line Entry Window open, and it will still work!
Some rules to consider:
1. You can open up a .csv file in Excel, make some minor modifications, and then save the file in the same format (.csv). The advantage of doing this, of course, is that the .csv file can still be opened using ReplayerStudio. However, if you plan to open this file in RPS, you must keep the same number of columns, and must maintain the same general format as shown above.
2. You can format .xls spreadsheet files to your liking (make some cells bold, others colored, change fonts, etc.). But remember to keep the format of the “StartTime”, “EndTime”, “Filename”, and “Folder” cells consistent and unchanged to avoid problems when using the Command Line Entry feature.
3. If you ever want to read a .xls file back into ReplayerStudio, you must first re-save it as a .csv file. You will lose all of your formatting changes in the .csv version, but they will be preserved in the .xls copy of your file.
4. Do not create multi-line “Name” cells in .csv files from within Excel. However, multi-line “Description” cells are permitted.
5. When writing to a .csv file, RPS automatically adds a leading space to the “StartTime” and “EndTime” cells. Just leave the leading space as is (even in .xls files) to avoid problems with the Command Line Entry feature.
6. And finally, make sure that you don’t have a .csv file open in Excel while attempting to write to the same file in ReplayerStudio. Excel puts a lock on the file, and an attempt to write to this file from ReplayerStudio will fail.
Using macros to play Bookmarks at the touch of a button
This is a very powerful feature, and once you get it working right, you will probably love it. It’s the ultimately convenient way to playback bookmarks.
All of the following procedures apply to MS Excel and Word "2003". I suspect that for other versions the procedures could be a little different:
Playback from MS EXCEL
Place the file, "rps_excel_macro.xls" (download here) in the folder, "C:\Program Files\Microsoft Office\OFFICE11\XLSTART" (or whatever the equivalent directory would be for your version of Excel.) This should install the ReplayerStudio Excel Play macro and assign it to the key, <Ctrl+R>
To run a "ReplayerStudio Bookmark Command Line" (4 cells containing start time, end time, filename and folder) place your cursor into the start time cell of the bookmark you want to see, and simply press <Ctrl+R>. This will run the macro that will open a new instance of ReplayerStudio and play the loop.
You might have to change the macro security level in order to get this macro to run:
- Select, "Tools/Options."
- Click the Security tab.
- Under "Macro Security", click Macro Security.
- Click the Security Level tab, and then select the security level you want to use.
To change the keystroke (<Ctrl+R>) that runs the macro:
- Open up any ReplayerStudio excel file (.csv or .xls file) (or the file "rps_excel_macro.xls" itself)
- Press <Alt+F8> (or select “Tools / Macro / Macros").
- Make sure that "Macros in:" is set to "All Open Workbooks".
- Press the "Options" button.
- Change the shortcut key to your liking (if you want the shortcut to be <Ctrl+Shift+SomeKey> then hold down the <Shift> key when you enter the shortcut key) and then click "OK"
- Press "Cancel" to get out of the Macro window.
- Exit Excel, and when it asks if you want to save "rps_excel_macro.xls", select yes. (Or save the file, and select yes when it asks the same question.)
The macro code is very short, and is as follows:
RPS = ActiveCell.Value & " " & ActiveCell.Offset(0, 1).Value & " " & ActiveCell.Offset(0, 2).Value & " " & ActiveCell.Offset(0, 3).Value
Call Shell("C:\Program Files\ReplayerStudio\ReplayerStudio.exe " & RPS, 1)
To modify the macro, you will need to first unhide the workbook in the "rps_excel_macro.xls" file:
- Open up any ReplayerStudio excel file (.csv or .xls file) (or the file "rps_excel_macro.xls".)
- Select "Window/Unhide" to unhide the workbook that contains the macro.
- Press <Alt+F8> and then press "Edit".
- Make sure that "Macros in:" is set to "All active templates and documents."
- Modify the macro code.
- Select "Window/Hide" to hide the workbook.
- Save your changes.
Playback from MS WORD
Place the attached file, "Normal.dot" (download here) in the folder, "C:\Documents and Settings\[your user name here]\Application Data\Microsoft\Templates" (or whatever the equivalent directory would be for you). If you already have macros defined for MS Word, they might be stored in the existing "Normal.dot" file, and so you would be overwriting this file and lose your existing macros. You should avoid this.
To run a "ReplayerStudio Bookmark Command Line" (one line containing start time, end time, filename and folder) place your anywhere on this line. Then simply press <Ctrl+R>. This will run a macro that will open a new instance of ReplayerStudio and play the loop.
You might have to change the macro security level in order to get this macro to run:
- Select, "Tools/Options."
- Click the Security tab.
- Under "Macro Security", click Macro Security.
- Click the Security Level tab, and then select the security level you want to use.
To change the keystroke (<Ctrl+R>) that runs the macro:
- Open up MS Word.
- Select "Tools/Customize".
- Select the "Commands" tab.
- At the bottom, press "Keyboard" (make sure that "Save in:" is set to "Normal.dot").
- Under "Categories" select "Macros".
- Put cursor in "New shortcut key" and press the new shortcut you want.
- Press the "Assign" button.
- Select the old shortcut and press "Remove".
- Select "Close" and "Close" to get out.
- Your changes are now effective and have been saved (no saving is necessary.)
The macro code is as follows:
pos = Selection.HomeKey(Unit:=wdLine, Extend:=wdMove)
Selection.HomeKey Unit:=wdLine
Selection.EndKey Unit:=wdLine, Extend:=wdExtend
Selection.MoveLeft Unit:=wdCharacter, Count:=1, Extend:=wdExtend
RPS = Selection.Text
Selection.HomeKey Unit:=wdLine
Selection.MoveRight Unit:=wdCharacter, Count:=-pos, Extend:=wdMove
Call Shell("C:\Program Files\ReplayerStudio\ReplayerStudio.exe " & RPS, 1)
To modify the macro:
- open up MS Word.
- press <Alt+F8> and then press "Edit"
- make sure that "Macros in:" is set to "All active templates and documents"
- modify the macro code
- save your changes
Small Bug in running Macros
You may notice that after running a macro to open up ReplayerStudio that the keystrokes do not function properly. This is because on some computers, the <Ctrl> will be locked.
To unlock, simply press and release the <Ctrl> key once, and then all keystrokes should work fine.
So, if this occurs, the procedure is easy enough:
Each time you run the macro, by pressing <Ctrl+R>, simply immediately press and release the <Ctrl> key.
To avoid this completely, you can set the macro keystroke from within MS Word to a key that doesn’t use the <Ctrl> key, such as the <F12> key.
In MS Excel, we think there is no way to set the macro keystroke to a key that doesn’t use the <Ctrl> key. Please let us know if you find otherwise.
Section VIII: Other Important Notes
Starting up ReplayerStudio
There are at least four ways to start up ReplayerStudio:
- By Selecting the Program Itself
The choices are:
- The ReplayerStudio icon found on the desktop
- Start -> Programs -> ReplayerStudio -> ReplayerStudio
- Running ReplayerStudio.exe, which normally resides in the installation folder (C:\Program Files\ReplayerStudio\ReplayerStudio.exe).
- Double-Clicking on Any Video File
When you installed ReplayerStudio, you selected file associations. These file associations are now linked to ReplayerStudio, so that any time you open up a file of the appropriate type, it will launch ReplayerStudio. For example, if you have a file called, “salsa_clip_1.mpg”, you can simply select it; this will launch ReplayerStudio and start playing the file.
· Double-Clicking on a .rps Video Catalog File
Selecting any .rps video catalog file will automatically launch ReplayerStudio, which will then place all of the bookmarks contained in that file into the bookmarks grid. You cannot open .csv video catalog files this way, because they will launch your preferred spreadsheet application, instead (normally MS Excel). But, but you can always launch ReplayerStudio and then select open a .csv catalog from there.
· From a Command Prompt
· 0 command line arguments
prompt>ReplayerStudio.exe
ReplayerStudio just starts up without any video file or catalog file loaded.
· 1 command line argument
The argument is the full path of a video file or a catalog file:
C:\>ReplayerStudio.exe C:\VideoClips\sample_video_clip.mpg
OR
C:\>ReplayerStudio.exe C:\VideoCatalogs\sample_video_catalog.rps
OR
C:\>ReplayerStudio.exe C:\VideoCatalogs\sample_video_catalog.csv
Relative filenames are allowed here. (e.g. C:\VideoCatalogs>ReplayerStudio.exe sample_video_catalog.csv)
· 4 command line arguments
The four arguments match a Bookmark Command Line: "start time" "end time" "filename" "folder")
C:\>ReplayerStudio.exe 00:01:00 00:02:02 sample_video_clips.mpg C:\VideoCatalogs\
If the "filename" or "folder" contains any spaces in must be enclosed by quotes(").
Relative "folder" names are not allowed -- the "folder" must contain the full folder path, regardless of what folder you are in from the command prompt.
The macros (discussed above) actually use this feature, by forming a command line with these four arguments.
Please Note: Unlike many Windows applications, you can run multiple sessions of ReplayerStudio simultaneously. To do this, simply leave your first session of ReplayerStudio open, and then follow any of the procedures above to launch a new session. This can be useful if you want watch several videos at the same time (for example, to compare them side-by-side).
The Options Window
You can open the Options Window by selecting “Tools / Options” from the main menu of the Video Playback Window.
Setting the Default Video Clip Directory
![]()
The above graphic shows the default directory ReplayerStudio
uses to look for video clips, for example, when you press ![]() to open a video file. You can change the
default directory by pressing the “Edit” button shown in the graphic
above.
to open a video file. You can change the
default directory by pressing the “Edit” button shown in the graphic
above.
Please Note: If you launch ReplayerStudio and then open a video file that is not in the default directory, ReplayerStudio will default to that directory for the remainder of your session. However, if you then exit ReplayerStudio and re-launch it, the program will again revert to the default directory. As such, opening a video file from within a different directory does not change the default directory ReplayerStudio looks in when it is first launched.
Playing Other Files in a Designated Directory at the press of a button
The convenient ![]() and
and ![]() buttons
play the next and previous video files, respectively, that are in the same
directory as the video file currently playing. Note that this may or may not
be the default video clip directory.
buttons
play the next and previous video files, respectively, that are in the same
directory as the video file currently playing. Note that this may or may not
be the default video clip directory.
However, if you press either of these buttons right after launching ReplayerStudio (i.e., before you have selected any video files to play), ReplayerStudio will look in the default video clip directory. If you pressed the “next clip” button or the <Page Down> key, for example, ReplayerStudio will play the first video clip in the default directory, and vice versa. (Please note that if you change the default video clip directory, you will have to exit and then re-launch ReplayerStudio for this to work properly).
Setting the Default Video Catalog Directory
![]()
The above graphic shows the default directory that ReplayerStudio
uses to look for video catalog files when you press the ![]() button. You
can change this default directory, if, for example, you want to keep your video
catalog files in another location. Press the “Edit” button shown
in the window above.
button. You
can change this default directory, if, for example, you want to keep your video
catalog files in another location. Press the “Edit” button shown
in the window above.
Please Note: If you launch ReplayerStudio and then open a video catalog that is not in the default directory, RPS will default to that directory for the remainder of your session. However, if you then exit ReplayerStudio and re-launch it, the program will again revert to the default directory. As such, opening a video catalog file from within a different directory does not change the default directory ReplayerStudio looks in when it is first launched.
Pop-Up Hints More Annoying than Helpful? Turn Them Off!
![]()
Once you are familiar with all of RPS’s features, controls, and functions, you will probably no longer need to see the descriptive messages that “pop-up” when you hover your mouse over a button. If this is the case, go to the Tools / Options window from the upper control bar and check the box to “disable showing all pop-up hints”. The pop-up hints will no longer appear.
Restoring the Original Keyboard & Window Settings
![]()
You can reset all keystroke commands and window settings to their default values. Simply press the “Execute” button. ReplayerStudio will then automatically exit. Re-launch ReplayerStudio, and all keyboard and window settings will be set back to their original values.
A more direct way to restore these settings is to simply delete the “config.txt” file from within the installation folder (normally C:\Program File\ReplayerStudio). In fact, executing the “Restore” function above simply removes the “config.txt” file for you anyway! However, you should manually do this only when you have no sessions of ReplayerStudio open.
This may be useful if keystrokes don’t seem to be working right, or if some windows are missing, etc. If ReplayerStudio seems to be functioning improperly, this may be one of the first things to try.
Please Note: Doing this will erase all of your saved window sizes, window positions, keystroke settings, jump number of frames / seconds / minutes settings, default directories, and bookmarks grid column sizes. However, it can be pretty quick to put all of these settings back to the way you had them.
Setting the Bookmark Play Click Behavior
(This is located under the “Cataloging” tab in the same Options Window.)
This option is useful when playing bookmarks via the “Play”
icons (![]() ), which are located in
the Bookmarks Grid of the Video Cataloging Window.
), which are located in
the Bookmarks Grid of the Video Cataloging Window.
Under the “Cataloging” tab in the same Options window, there is:You can choose from three options:
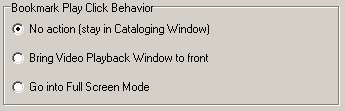
Option #1: No Action (stay in Cataloging Window)
This option will keep the bookmarks grid active (and in front) after you play a bookmark using the "Play" icon.
Use this option if you want to keep both the Cataloging Window and the Playback Window visible on your monitor (not overlapping), and want to keep the bookmarks grid active after selecting a bookmark to play. This way, you will be able to continue to use your arrow keys to move around the bookmarks grid without having to first press the view Catalog Window (“2”) key.
Option #2: Bring Video Playback Window to Front
This option will make the video playback window active (and bring it to the front) after you play a bookmark using the "Play" icon.
If you prefer to maximize your windows, then this might be a better option. Say, for example, that you have your Video Cataloging Window maximized. Choosing Option #2 will mean that, when you play a bookmark, the Video Playback Window will automatically move to the front so that you can actually view the video without having to first press the view Catalog Window (“2”) key. Then, when you want to bring the Cataloging Window back to the front again, simply press “2”.
Option #3: Go into Full Screen Mode
When this option is selected, ReplayerStudio will automatically play any bookmark in Full Screen Mode. This is the equivalent of playing the bookmark, then pressing the Full Screen Mode (“5”) key. Thus, the Video Playback Window will be moved to the front (and made active), and all Player Control Panels will be hidden to make room for the largest video viewing area.
This might be a preferred option if you’ve memorized all the Player Control keystroke commands and don’t need to see the bookmark descriptions as the bookmarks are playing. To return to the Cataloging window, just press “5” and then “2”.
Click here for more information on the use of the view Window controls.
Click here for suggestions on how to best layout your Playback and Cataloging Windows.
Please Note: The “Bookmark Play Click
Behavior” option is only relevant when using the “Play icons” within the
bookmarks grid to play your bookmarks; this option does not affect how
bookmarks are played when using the buttons, or their
associated keystrokes.
Miscellaneous Features
Lock to Original Clip Size
Normally, ReplayerStudio automatically expands your video clip to fit all available space within the Video Playback Window. However, there might be times when you don’t want this to happen. For example, if your video clip is of lower quality, then enlarging it may degrade the picture quality too much. Furthermore, shrinking the Video Playback Window may not be a good solution, because doing this may hide some of the Player Control Panels. Instead, under the “View” menu (upper toolbar):
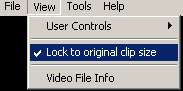
select “Lock to Original Clip Size” to hold your clip at its original size. The video display will then not expand, no matter what size of the Video Playback Window you use.
Video File Info Window
You can view some very useful information about your video clip from the upper tool bar. Go to: “View / Video File Info” and this Video File Info Window will appear:
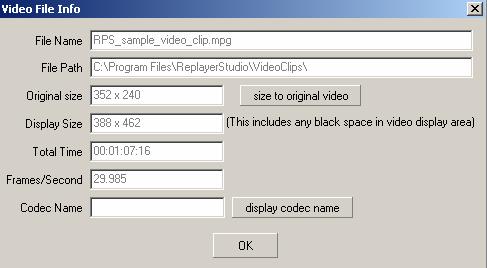
This window provides information such as: file name, file path, native video resolution, current video resolution, total time of video clip, number of frames per second, and the video codec used to compress / decompress the video clip (if available). From within this Video Info Window, you can press the “size to original video” button to automatically re-size this clip to its original dimensions. However, doing this will shrink the whole video window, not just the video display size. As such, this is a different feature than the “Lock to Original Clip Size” command described in the previous section.
Importing Multiple Video Clips into a Single Video Catalog
ReplayerStudio was especially designed for selecting short scenes from within long video files, and then saving them for future playback/analysis. This is what the bookmarking and cataloging features are all about. Essentially, RPS’s video cataloging capabilities accomplish the same thing as chopping up a large video file into many small clips. Therefore, in many cases, ReplayerStudio eliminates the need to use a video editor for this purpose.
Regardless, you may at some point want to import several video clips into a single video catalog. One way to do this (the long way) is to add each video file to your video catalog as an individual bookmark. That is, open the first video file, then use the Loop Controls to set the start time to “00:00:00,” leaving the end time undefined. Then, save this very large “loop” as a bookmark by pressing the “add bookmark” button. Doing this will define the entire video file as a bookmark in your video catalog. But you would then have to repeat the same laborious process for the next video file, and so on.
Fortunately, there is a much faster way to add multiple video files to your video catalog. This “shortcut” essentially bypasses the Loop Controls:
- First, simply press the
 button,
which is located in the upper-right corner of the main Video Playback
Window.
button,
which is located in the upper-right corner of the main Video Playback
Window. - From there, you can select as many video files as you want. (To select multiple files, simply hold down the <Shift> or <Ctrl> keys.)
- ReplayerStudio will then start a new video catalog (unless you already have one open), and will add these files to the bookmarks grid.
- Each bookmark will be assigned a start time of “00:00:00” and an end time of “--:--:--”.
You can also add several video clips to a video catalog by dragging and dropping:
- Open a video catalog file from within ReplayerStudio. (If you want to start a new video catalog, you’ll have to first select a clip(s), as described in steps 1-4 above.)
- Open the folder containing your video clips using Windows Explorer.
- Select all of the files you want to import by highlighting them with your mouse (You can select multiple files from within Windows Explorer by using the <Shift>, <Ctrl> or <Ctrl+A> keys.)
- Use your mouse to drag the highlighted files directly from Windows Explorer into the Bookmarks Grid within RPS’s Cataloging Window.
- ReplayerStudio will automatically assign each bookmark a start time of “00:00:00” and an end time of “--:--:--”.
You can also drag and drop files to the main video window. Doing this adds each file (beginning to end) as a bookmark in the bookmarks grid.
· If you drag and drop multiple files at a time they will be added to the bookmarks grid.
· If you drag and drop just one file into the main window it will play and you will be asked if you want to add it to the bookmark grid as well.
Fixing Lost or “Broken” Bookmarks within a Video Catalog
You may at some point need to change the name of one or many video files that are referenced in your video catalog(s). You might do this, for example, from Windows Explorer. Or, you might need to change the file location of one or more of your video files, for example, if you want to re-organize your hard drive. Either of these actions will temporarily “break” the video catalog(s) that references the re-named or re-located files. Essentially, ReplayerStudio will now point to files and/or folders that no longer exist.
To solve this problem, you could open up all of the affected video catalogs and then manually enter the new Filenames and/or Folder locations. Of course, you would have to know the proper Filename and Folder formats (click here for an explanation). But this would be a lot of work, even using a text editor with copy and paste capabilities. Fortunately, ReplayerStudio includes a feature that makes the process of repairing lost or broken bookmarks much easier.
The first step of this feature is a safety check. Whenever you open a video catalog, ReplayerStudio automatically checks to make sure that all bookmarks do, in fact, point to video files and folders that exist. If ReplayerStudio fails to find any video file or folder, it will give you the following message:
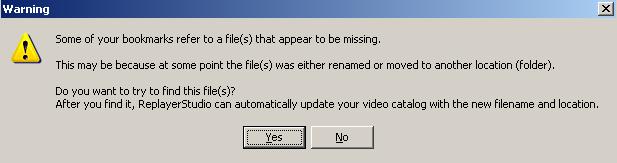
If you select “Yes” to the above message, ReplayerStudio will ask you a brief series of questions. Essentially, you will have to help ReplayerStudio identify any re-named video files, and/or find where any video files were moved to. There are two ways that RPS addresses this:
- By asking you to identify the re-named or re-located video file. If you simply renamed a video file (and/or moved it), ReplayerStudio will ask you to locate the file from within an open dialog box. Once you identify the file, ReplayerStudio will know the new name of the file (and/or its new location) and can then make all of the necessary updates to your video catalog. Even if several bookmarks point to this video file, ReplayerStudio can update all of them simultaneously.
- By asking you to identify the folder into which video file(s) was re-located. If you simply moved one or several video files into a different folder, then you can show ReplayerStudio where this folder is. ReplayerStudio can then update the Folder location of all broken bookmarks.
Thus, ReplayerStudio essentially uses your guidance to automatically update all of the Filename and Folder cells within the video catalog, so that they again point to the appropriate video files. Of course, if several video catalogs are broken, you will have to go through this same process for each one. But it shouldn’t take very long, provided you know the new name(s) and/or location(s) of the “missing” video files.
Important: After ReplayerStudio has updated your catalog file, remember to save it so that you don’t have to do this again!
If you prefer to manually make these changes yourself (i.e., by directly editing the Filename and Folder cells within the bookmarks grid), select, “No” to the above warning message.
Please Note: If ReplayerStudio doesn’t seem to update all of the broken bookmarks in the first pass (or if you elected to skip updating some bookmarks), then you can always save the affected video catalog, then open it again. When you re-open it, RPS will again check for broken or lost bookmarks, and you can repeat the automatic updating process, if needed.
There are a couple of other tools to help you manage bookmark file and folder locations:
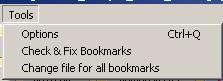
You can, “Check & Fix Bookmarks” – this is esentially the same as the check that RPS performs whenever opening a catalog file
You can also “Change file for all bookmarks”. After chosing this option, you will see the following.
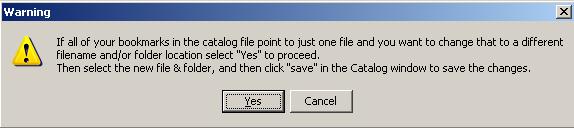
This is useful for when you may have two copies of the same file, but want RPS to use the copy in the second location.
Getting the Most out of ReplayerStudio
Learning to Use the Keyboard as much as Possible
RPS’s developer invested a lot of time making the program as keyboard-friendly as possible. Mouse buttons are very user-friendly for casual users, but, ultimately, keystroke commands will prove to be much faster and more efficient. If you plan on using ReplayerStudio as your main tool for watching video, then learning the keyboard equivalents will be a very good investment of your time.
By default, ReplayerStudio assigns easy-to-reach keys for functions you are likely to use over and over again. To illustrate this point, the following tour may be helpful:
Within the Video Playback Window
Begin by memorizing the keystrokes for all of the player and window controls, which appear at the bottom of the Video Playback Window. Your left hand will control the position of video playback (the time code), while your right hand can control the speed of playback. Of course, this is only a suggestion; you can change this around if you like.
Some common keystrokes to learn first are:
- The ‘c’ key: Opens a dialog box in Windows Explorer, from where you can select and open media files.
- The ‘r’ key: Re-starts the currently playing video clip from the beginning (don’t ever bother with the slider bar; pressing ‘r’ is much easier!)
- The ‘g’ and ‘h’ keys: Help you define a loop by setting start and end times, respectively. Just watch your video clip, while keeping your fingers over these keys. Hit the keys when you come to the beginning and end, respectively, of the clip you want to loop. There’s no need to pause the video playback!
- The ‘t’ and ‘y’ keys: Toggle the playback mode between “play loop” and “play full video.”
- The ‘o’ key: Creates and adds a bookmark (must have a start time designated).
- The ‘z’ key: Exits ReplayerStudio.
Believe it or not, you can operate the “Bookmark Currently Playing” pull-down menu via the keyboard, as well. To get into this pull down menu, hold down the <Shift> key and then press <Tab> from within the Video Playback Window. Then, you can:
- Use the up and down arrows to move through the list of available bookmarks; press <Enter> to play the selected bookmark.
- If you decide not to select any bookmark and want to get out (and thus back to having the keyboard active for player controls, etc.), simply press <Tab>.
- At any time you can go back to the original selected bookmark by pressing <Esc>.
- Press the ‘spacebar’ to pop down the entire list, and use the arrow and <Enter> keys, as described above.
- If you decide not to select any bookmarks, and want to get out (and thus back to having the keyboard active for player controls, etc.), press <Esc>.
- Press the first letter of the name of the bookmark you are looking for to move through the menu in an alphabetical fashion. This will take you to the first bookmark in the list that has a name beginning with the letter you chose. Press the same key again and it will move to the next bookmark starting with the same letter, etc. If you then press another key, you can find the first bookmark in the list that begins with that letter, as well.
- If you decide not to select any bookmarks, and want to get out (and thus back to having the keyboard active for player controls, etc.), press <Esc>.
Within the Video Cataloging Window
The only bookmarks grid operations that require the use of the mouse are file operations such as saving, closing, and opening, as well as sorting and moving bookmarks. However, these aren’t operations that are used all that often. Everything else can be done without using your mouse:
- Use the arrow keys to move from cell to cell within the bookmarks grid; as you move up and down vertically through the bookmarks grid, the description box will change to reflect the row you are in.
- Use the arrow keys to highlight the “play” icon corresponding to a bookmark you want to play; then press <Enter> to play it.
- Use the <Tab> key to toggle between the description memo box and the bookmarks grid.
- To edit any of the cells in the bookmarks grid, use the arrow keys to select a cell, and then press <Enter> to get into edit mode. Edit the cell, and then press <Enter> again to get out of edit mode. More specifically:
- In the “Name”, “Start Time”, “End Time”, “Filename”, and “Folder” cells, press <Enter>, then type over the new value. Or, get into edit mode, then use the left or right arrow keys to move through the value, and edit the value in a specific location. Then, press <Enter> again to get out of edit mode and to save the changes you made.
- For the “Learn” and “Rating” cells, press <Enter>, then you can simply type in a new value. You can also use the up and down arrow keys to adjust the value. Press <Enter> again to save your changes.
Remember, while in edit mode, you can press the <Esc> key to discard your changes and restore the original contents of the cell.
- To delete a bookmark, use your arrow keys to select the very first cell (far left) in the row of the bookmark you want to delete. This will highlight the whole row. Then press the <Del> key. You will be prompted if you’re sure you want to delete the bookmark. Press <Enter> to confirm the deletion.
Keystrokes Work from Almost any Window
Note that all of the keyboard controls work not only from within the Video Playback Window (where most of the buttons themselves appear), but also in the Cataloging Window. They also work when the Command Line Entry or Video File Info Windows are active. Thus, even though a given button doesn’t appear in a given window, its keyboard equivalent will work anyway.
This means that you can completely control video playback, adjust screen sizes, playback bookmarks (via the “previous”, “current”, and “next” functions) from any window. So, you can actually:
- Control video playback, define start and end times, and add new bookmarks from within the Cataloging Window.
- Playback bookmarks via the “previous”, “current”, and “next” functions (using the assigned keystrokes “8”, “9”, and “0”) from within the Video Playback Window.
An Efficient Workflow Example
Say you’re going through some new video footage and want to quickly bookmark everything of interest. Here’s an efficient way to do it:
1. Play the clip and/or use the Advanced Video Controls to move around until you come to a point of interest.
2. At the beginning of a scene of interest, hit the ‘g’ key to set the “Start Time.”
3. Let the video continue playing, or use the Advanced Video Controls to quickly find the end of the scene of interest.
4. When you reach the end, hit the ‘h’ key to set the “End Time” (or, optionally, leave it blank).
5. Then, hit the ‘o’ key to save the loop as a bookmark. The video will pause now, maintaining your place in the video clip.
6. Enter a name for the scene (or dance move) and hit <Enter>. The Video Cataloging Window will open.
7. Press <Tab>, type in the description for this scene, and press <Tab> again to get out (or you can do this later).
8. Press the “1” key to bring the Video Playback Window to the front (or, stay in the Cataloging Window – it doesn’t matter since all keystrokes will work from here as well).
9. Press the ‘spacebar’ to resume playback, and/or use the Advanced Video Controls to move to the next point of interest in your video clip.
10. Repeat the process from Step #3 again, until you have finished bookmarking your entire clip.
You can always adjust the start and end times of your bookmarks at some later time, if, for example, you set them a little too early or too late (this could happen if you defined your bookmarks quickly; you can always go back and refine them later). You can do this from within RPS’s bookmarks grid, or even from within a text editor (.rps file), word processor (.rps file), or spreadsheet application (.csv file). (However, you will have to understand the structure of the video catalog file in order to do this. For an explanation of this, click here).
Maximizing Your Display Areas
In order to maximize your video playback display area and still be able to see the Cataloging Window, you might want to:
· Maximize the Video Playback Window
· Set the User Controls to “hidden” (once you have memorized the keystroke controls, of course.)
· You can also maximize the Cataloging Window
o If you do this, you will want to set the “Bookmark Play Click Behavior” to either Option #2 or #3. While viewing and editing your bookmarks, you won’t be able to see the Video Playback Window, but when you play a bookmark, the Video Playback Window will automatically be brought to the front. Click here for more info.
· Use the “1” and “2” keys to toggle between these maximized windows at any time.
Dance Practice Mode
If you can manage to have your computer monitor next to you while on a dance floor, you can actually view the dance mode as you practice it yourself.
We suggest:
- Set to loop continuously (
 ).
). - Set to slow motion playback (
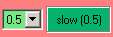 ).
). - Select Option #3 in the “Bookmark Play Click Behavior” box to automatically go into Full Screen Mode. Click here for more info.
- Select the appropriate “Play” icon to start playing back your bookmark/dance move.
This way, you should be able to see the action although you may be several feet away from your monitor. The move will playback slowly so that you can follow along, and the loop will repeat so that you won’t have to walk back to your computer.
Extra Feature – Jumping to start and end of loops and bookmarks
To jump to the start/end time of a loop, press
<Shift+G>/<Shift+H>, or, hold down <Shift> and press buttons
themselves.
If no start end end times are defined, pressing these keys
will bring you to the beginning and end of the clip.
In "Play All Bookmarks" mode, <Shift>
buttons are disabled, but you can still use the equivalent keystrokes.
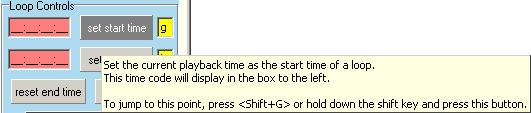
To jump to the start/end time of any bookmark in bookmarks grid:
Press <Shift+Enter> or <Shift+MouseClick> in
EndTime cell jumps to end of the bookmark.
Pressing <Shift+Enter> or <Shift+MouseClick> in
any other cell in row jumps to beginning of bookmark.
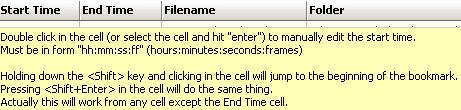
These features can be quite useful when you want to edit the stand and/or end time of several bookmarks you have previously defined.
Other Tips & Tricks for Using ReplayerStudio
Making a Mock-Up of Your Final Video Project
ReplayerStudio enables you to play all of your bookmarks sequentially, from beginning (or from any other point), to end. If you are selecting various scenes that will eventually be included in a final video output (such as a documentary or maybe even a video journal of your vacation, wedding, etc.), this tool will enable you to preview your project (minus transitions and other effects) so that you can get an idea of how the finished product looks and flows. Since a single ReplayerStudio video catalog can reference clips from various video files, the video catalog itself can become your mock-up.
For example, you can use RPS’s bookmarks grid to easily reorder and edit the scenes in your video project (change the “in” and “out” times). You can also view this video mock-up—without interruption—using the “Play All Bookmarks” mode (for more information on this feature, click here). Then, when you’re satisfied with the mock-up, you can use your favorite video editor to quickly and efficiently cut up the raw video at the in- and out-times that you already designated!
In fact, RPS’s bookmarks grid makes re-defining and changing the order of the scenes in your mock-up so easy that you may decide to entirely abandon your video editor for this process. In addition, RPS’s annotating capablities (such as the description memo box) enable you to, well, annotate your scenes to far greater extent than do most video editors. For especially long or complex projects, such detailed notations can really facilitate the process of choosing, editing, and arranging clips.
Manually Editing Video Catalog Files
There are various reasons for directly editing video catalog files:
- To change start and/or end times of several bookmarks at the same time:
Perhaps you want all of your scenes or dance moves to start a couple of seconds earlier. You could open the video catalog file up in your favorite text editor, and quickly go through the file, changing all of the start times to two seconds earlier.
- To change filename and/or folder names:
If you move all of your video files to a new location on your hard drive, then your video catalog files will no longer work. One way to fix this is to open up the catalog file(s) and then edit all of the folder names to reflect the new location of the video files that are referenced. Most text editors such as MS Word have fast and convenient “search and replace” functions that can make doing this very quick and easy. However, please keep in mind that ReplayerStudio has a feature that will do much of this for you (click here.)
- To copy bookmarks:
There is no way to directly copy bookmarks from within bookmarks grid. One indirect method for copying a bookmark is to playback a given bookmark, and then press the “add bookmark” button. Doing this will create a new bookmark with the same start and end times as the previous one. But, you will then have to re-enter the bookmark name and description. Through the editing the catalog file in a text editor, however, you can directly copy the whole bookmark very quickly using a simple copy and paste command.
In order to edit any video catalog file, you will need to understand its format and structure:
- To understand the structure of a .rps (“ReplayerStudio Video Catalog”) file, click here.
- To understand the structure of a .csv (comma separated file) spreadsheet file, click here.
Turning Your Video Catalog File into an EDL and a Batch Capture File for Video Editing
This topic only applies to video editing, and probably only video editing at the professional level.
We haven’t spent much time doing this yet, but it is possible to quickly turn ReplayerStudio video catalog files into a batch capture file.
For example, the Canopus DV Storm Video Capture and Editing system allows you (using Storm Edit) to do batch capture using a file formatted as follows:
File contents (of example file HMSA_TAPE_C.cbl):
1 00:05:00 00:37:00 00:32:01 V:\HMSA-III-IV\Clips\HMSA_15_15_d.avi
1 00:34:00 01:16:00 00:42:01 V:\HMSA-III-IV\Clips\HMSA_15_15_b.avi
1 01:28:00 02:16:00 00:48:01 V:\HMSA-III-IV\Clips\HMSA_15_14_b.avi
1 02:10:00 02:37:00 00:27:01 V:\HMSA-III-IV\Clips\HMSA_15_16_a.avi
1 02:46:00 03:23:00 00:37:01 V:\HMSA-III-IV\Clips\HMSA_15_16_b.avi
1 03:21:00 04:00:00 00:39:01 V:\HMSA-III-IV\Clips\HMSA_04_05_a.avi
1 03:59:00 04:34:00 00:35:01 V:\HMSA-III-IV\Clips\HMSA_04_05_b.avi
1 04:30:00 05:11:00 00:41:01 V:\HMSA-III-IV\Clips\HMSA_04_06_a.avi
As you can see, this is similar to the format of a ReplayerStudio video catalog file. In a short period of time, you could manipulate a RPS catalog file (either type, but probably the .csv file format would be easier in this case) into the above format. Then, you could import this file into your batch capture program, which would then automatically read the original DV tape, and then generate a separate file for each scene in your project.
When Eric makes his next instructional dance video, he plans to exclusively use RPS to analyze and choose all of the important scenes that will be included in the final output. In addition, he will use RPS to generate a batch capture list like the one described above. Thus, he will be able to produce a complete mock-up of his final video project, including all of the selected scenes, in their proper order, even before opening up a video editor! He will then use his batch capture list to instruct a video editor to scan the original DV tape, select the appropriate scenes, and create each scene as a separate video clip. Thus, ReplayerStudio will greatly facilitate the production process for Eric’s next video!
Section IX. Version 1.5 Enhancements
2. PRECISE TIME CODE for looping and bookmark start & end times
All your catalog files are backward compatible. The first time you open up your existing catalog file, ReplayerStudio will automatically insert ":00" (0 frames -- the beginning of the second) onto the start and end times. So all information is preserved, and you can optionally add frame precise information anytime later.
(Also, "Command Line Entry" is also backward
compatible -- you can pass it the format "hh:mm:ss:frames" or the
format "hh:mm:ss".)

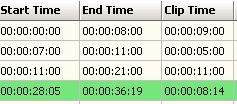
3. "Clip Time" column in Bookmarks Grid and ability to calculate
total clip time
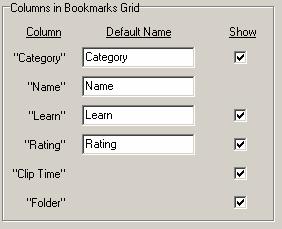
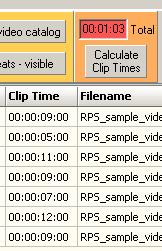
4. "Conversion and Constant-Pitch Speed
Controls” features
![]()
In RPS itself, place your cursor over each of the three controls, and carefully read the pop-up hint. This is a very powerful new set of features.
There are two basic features here:
- If you are playing a file in RPS that doesn’t respond well to “Advanced Player Controls” (such as jumping back by 3 seconds), try pressing the “converted” button. Then RPS, will “Frameserve” (a technical term here that it not necessary to understand) the file instead, and then it is likely the “Advanced Player Controls” will respond well!
- If you want to play the video clip at a slower or faster
rate, but preserve the original pitch of the audio (so that the music
and/or voice(s) sound normal), then simply enter a new value in the box,
 (100 for normal
speed – 80 for 80% of normal speed, etc.) and then (or previously) press
the “converted” button and watch it work!
(100 for normal
speed – 80 for 80% of normal speed, etc.) and then (or previously) press
the “converted” button and watch it work!
11. Ellipsis shown at end of text for cells that contain text that is wider
than the cell width.
Shows full text when hovering over these cells.
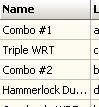
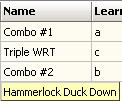
Section X: The BeatCounter©
The BeatCounter© allows you to set an unlimited number of "markers" or "beats" within a RPS bookmark.
Simply playback a bookmark, and repeatedly hit the "~" key for each spot you want to create a marker.
This usually would be on every "1", "2", "3", "5", "6" and "7" count of the music, but there are several options available.
Then, you will be able to see and hear the beat the next time you play back the bookmark.
Most useful applications for the BeatCounter©
1. Helping students hear the beat in music
If you’re having trouble hearing the beat or counting the beat for a favorite (or any) song, ask a teacher or friend to create the BeatCounter marks for the song(s) in question.
- This person (the “teacher”) can tap out the beat, and RPS will remember all the tapped information in a Video Catalog file (.rps file)
- You can then open this same RPS Video(Audio) Catalog file. (Student must have same Audio file on his/her computer.)
- Student can then see and/or hear the beat!

- Audio beeping sound can be decreased over time as student gets better at hearing the beat.
- Teacher can tap out several songs and then distribute the RPS Video Catalog file to students to practice at home.
- As long as student legally obtains a copy of the identical song, then there are no copyright violation issues, and thus any song can be used!
- As a teacher, you can create BeatCounter data files for any number of the songs you like to use (teach to). Then you can distribute these files to your students. You could even sell these files to a fee.
2. Hearing and/or seeing the beat while watching video
- Simply play back the video clip in question, and tap out the beat using one key on your keyboard.
- RPS will remember all your taps and display them in the
small panel () when you play
back the video clip.
- This can help students with problems hearing the beat to know what beat the dancers are on.
- However, more important, this can help the viewer to know what beat the dancers are on without having to pay attention to the music:
- While the playback is paused the beat number will be displayed!! Now advancing frame-by-frame you will be always know what count the dancers are currently on without having to guess.
- When resuming playback, you will know the beat instantly, without having to back up to determine the count again.
- The same applies to slow motion: It may be hard to know what beat the dancers are on while playing in slow motion. With the BeatCounter data, this becomes trivial (you can mute the audio which sounds funny in slow motion mode, and just hear the beats tapped out.)
- There is a button to jump forward and back by beats and even by measures allowing even more convienent control to review moves. For example, you can quickly back up to the exact beginning of a move back pressing the "back measure" button a few times.
- You can also step forward through the dance, one beat at a time. Imagine being able to actually click through a routine BEAT by BEAT, which was previously impossible. (Frame by frame can be way too slow, and advancing 5 frames at a time most often skips over steps and you can’t see where the dancers put his/her foot down. “The foot was almost about to hit the ground and then next click, whoosh, it’s up in the air again ready to step somewhere else.”)
Quick Start Guide for the BeatCounter
To bring up the BeatCounter window, press the ![]() button
from the windows control panel in the main video window, or just press the “3”
key from anywhere in the application.
button
from the windows control panel in the main video window, or just press the “3”
key from anywhere in the application.
1. Select "Beat Count Recording Method"
2. Create Bookmark
3. Play Bookmark
4. Record beats by pressing repeatedly the ~ key (key in top
left of keyboard but without using the <Shift> key), or press the  button.
Or, press the  button, and then press
each key you want to record.
button, and then press
each key you want to record.
5. Press green flashing button (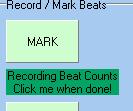 ) when done
recording beats.
) when done
recording beats.
6. Playback by replaying the bookmark.
How RPS stores BeatCounter marker information
All the markers created are stored in the Bookmark’s Description Box:
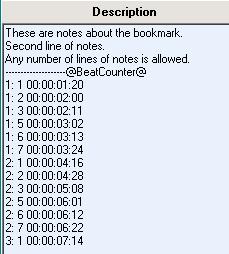
If you like, you can manually create or edit the BeatCounter marker information.
RPS stores this information in the Description box, after the description itself. First there is a line, appearing exactly as:
--------------------@BeatCounter@
(20 of “-“ followed by “@BeatCounter@”)
Then each line contains one BeatCounter mark:
![]()
Each mark contrains three fields, and each field is separated by a space:
- The first field is the “measure” number: A number following by “:”
- The next field is the “beat” number. However, you can edit this field to be a letter, or even a multi character word (as large as will fit in the BeatCounter Panel).
- The last field is the precise TimeCode. You can edit this field yourself at any time.
BeatCounter Recording Methods
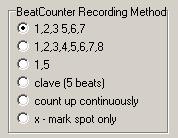
RPS will automatically number each beat number you are marking. But you have to tell it on what beats of the music you will be pressing the “MARK” or ~ button:
- If you want to press MARK on every “1,2,3, 5,6,7” count, select the first option.
- If you want to press the MARK button at the beginning of each measure (on “1” and on “5”) then select the “1,5” option.
- If you simply want RPS to count up on each MARK press, then select the second to last option.
- If you don’t want RPS to count for you, select the last option, and RPS will simply insert an “x” instead of a number. Later you can manually edit these “x”’s to display anything you want.
Jumping around from beat to beat or measure to measure
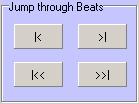
The first row of buttons is for jumping from mark to mark (beat to beat) (second field in the BeatCounter markers)
The second row of buttons is for jumping to the next/previous “1” mark. RPS will simply find the next/previous beat (first field in the BeatCounter markers) labeled exactly as “1” and jump to there.
Display Options
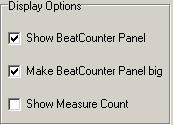
- Make sure to select, “Show BeatCounter Panel” or you won’t see anything.
- Selecting, “Make BeatCounter Panel big” is used when listening to music, not video, and you want to see the BeatCount info possibily from far away (like while dancing.)
- “Show Measure Count” will display the “measure” count in addition to the “beat” count.
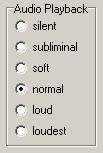
- If you just want to see the BeatCounter Panel display and not hear an audio beeps for each mark, select “no audio”.
- The other three audios levels should be set according to how hard of a time you are having hearing the music. You might want to start out with the loudest setting. When you pretty much have mastered hearing the beat, you can set the Audio Playback level to “soft audio” and the beat will almost be “subliminal” in that you will be helped in hearing the count, but may not be conscious of the beep.

RPS can only display and sound the beats that are recorded in the DescriptionMemo box. However, perhaps you don’t want to hear/see all of the beats at all times.
By manipulatiing the eight little Beat Display select buttons, you can decide which beats to hear/see and which not.
For example, assuming you have all eight beats recorded, but just want to hear the downbeats, just turn on beats, “1”, “3”, “5”, “7”, and turn off the others.
To see/hear just the beginning of each measure, turn off the “1” and “5” beats, etc.
Modifying BeatCounter Data
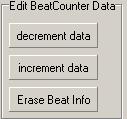
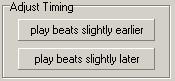
If you want to start over again creating BeatCounter marks, simply press the “Erase Beat Info” button, and you will see that all Beat info has been erased in the DescriptionMemo box.
The “decrement data” and “increment data” buttons are very useful:
- If you want each mark to play and/or sound just a little bit earlier with respect to the music and video playback, simply press the “decrement data” button once or more.
- If you want each mark to play and/or sound a little bit later with respect to the music and video playback, press the “increment data” button once or a few times.
Other ways to edit BeatCounter data include:
- To modify the “beat” number and/or TimeCode of any BeatCounter mark, just manually edit the info in the DescriptionMemo box.
- If you want to insert some marks between other marks, simply go the spot that you want to mark in the video/audio file, and press the “MARK” button. RPS will automatically insert the mark in the right spot in the BeatCounter list. (RPS maintains all marks in TimeCode order.)
- If you want to re-do a certain section of the BeatCounter data, then first manually delete all the data in the DescriptionMemo box, and then play the video/audio file again pressing the “MARK” button to add the data.
- If the count does not start on “1”, then you will have to press the “MARK” button a few times extra to get on the “right beat.” Then when you are done recording BeatCounter data, you must manually go back to the DescriptionMemo box and delete out those bogus marks.
Using the BeatCounter to help you hear the beat
From the “Direct Play” window (the first window you will see when starting up RPS), select “Audio Catalogs” and then double click on the Audio Catalog, “Los Mejores de la Salsa 2005.rps” (this Audio CD needs to be purchased separately from Salsaville.com and comes with this Audio Catalog, otherwise you won’t see this AudioCatalog):
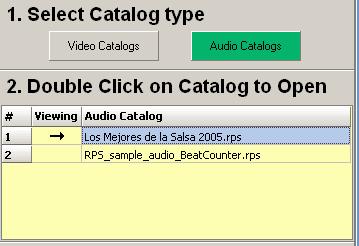
This will bring the following:
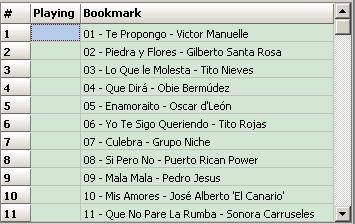
Now simply double click on any song to start playing it. You should also hear and see the beat now!
To select which beat to hear simply select “Play Beats”:
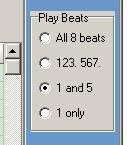
Pressing the “3” button will bring up the following window:
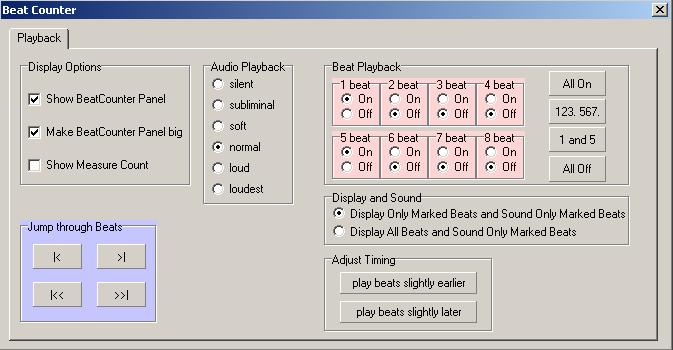
If you want to hear the beat louder or software, use the “Audio Playback” selection.
To select any combination of beats to hear, select the “Beat Playback”
This is how we recommend you improve at hearing the beat:
- Play the song with beats, “1,2,3,5,6,7” selected.
- Play the song with beats, “1, 5” selected.
- Play the song with beat, “1” selected only.
- Decrease the “Audio Playback” volume and repeat steps #1 - #3.
- Try turning off the beats for a short period of time (by pressing the “All Off” button in the BeatCounter window (shown above)), keep time in your head, and then turn the beats back on (by pressing the “123. 567.” button) and see if you still have the correct beat.